
Recapp / Resources
User Guide
Your Recapp manual: simple steps, light-theme screenshots and every settings category.
0.9.1 interface · Reviewed October 13, 2026
01
Start here
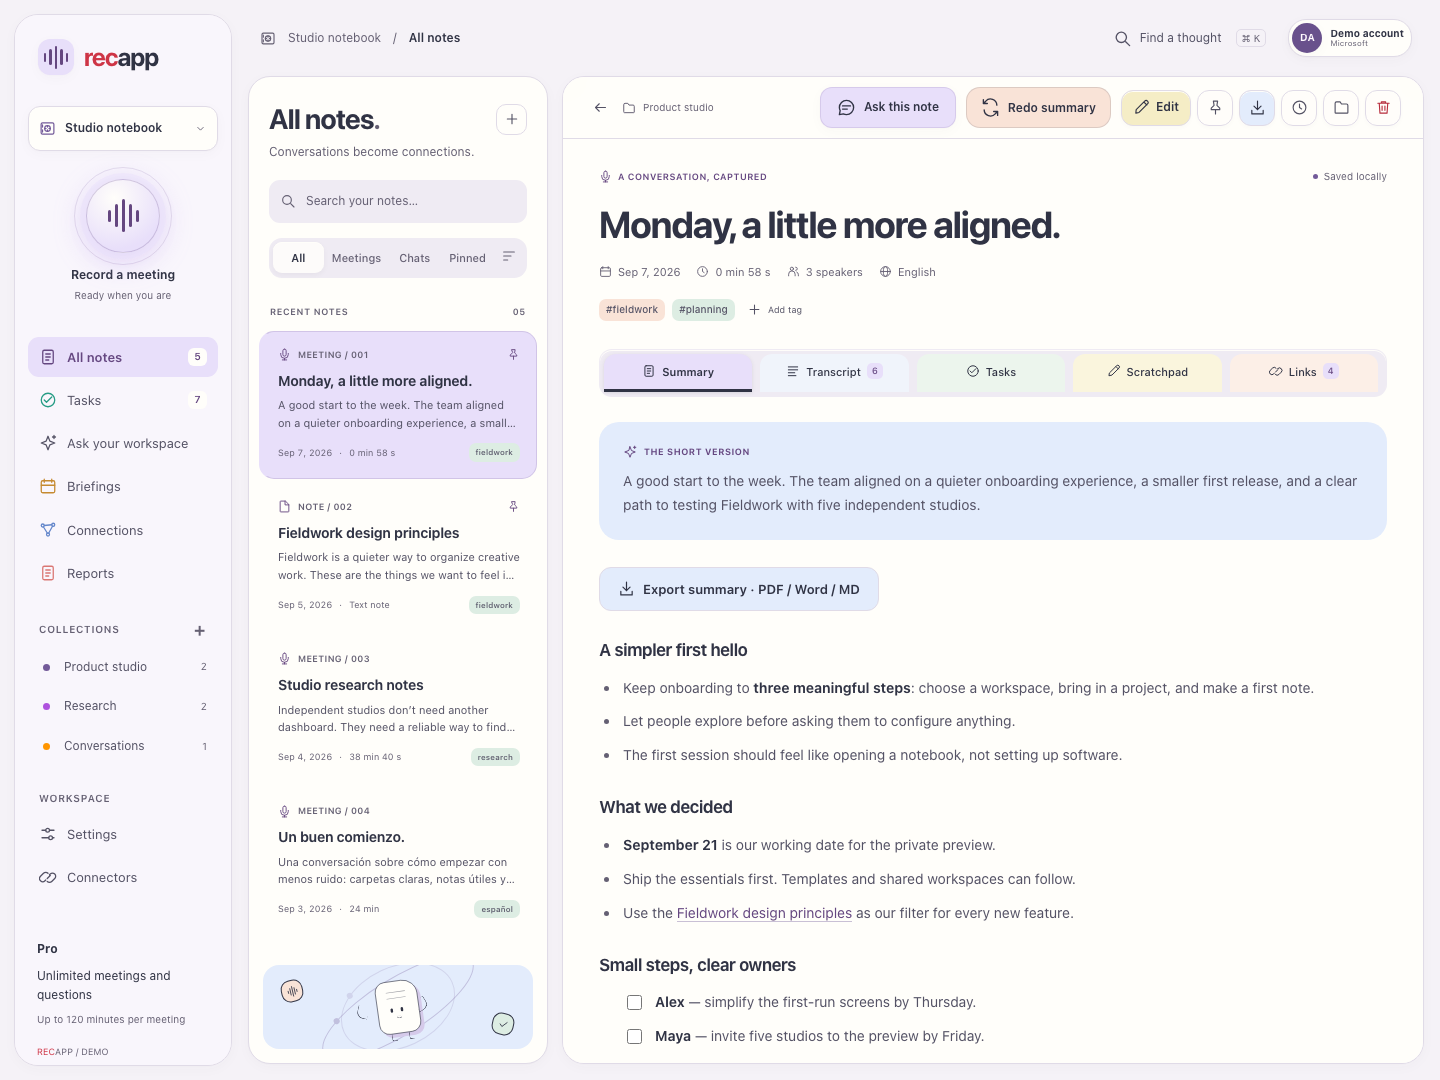
Recapp turns your conversations into notes you can review, search and share. This manual covers the 0.9.2 interface.
- Install Recapp from the Downloads section of recapp.ca, then sign in with an available Google, Apple or Microsoft account.
- Open Settings → Preferences. Choose English or Español and Light to match this guide.
- Read the website Privacy policy for details about Azure processing. The app links to it in Settings → Preferences.
- Choose your workspace, select Record, give the meeting a title and start. When you stop, open the saved note and review it.
Pictures show the real shared app interface with fictional demo content. Recording, AI, payments and connected accounts in the demo are simulations. Availability depends on your installed version, platform, plan and service configuration.
Back to top ↑02
Workspaces and notes
A workspace is an ordinary folder that holds your notes and related files. The selected workspace controls where new work is saved.
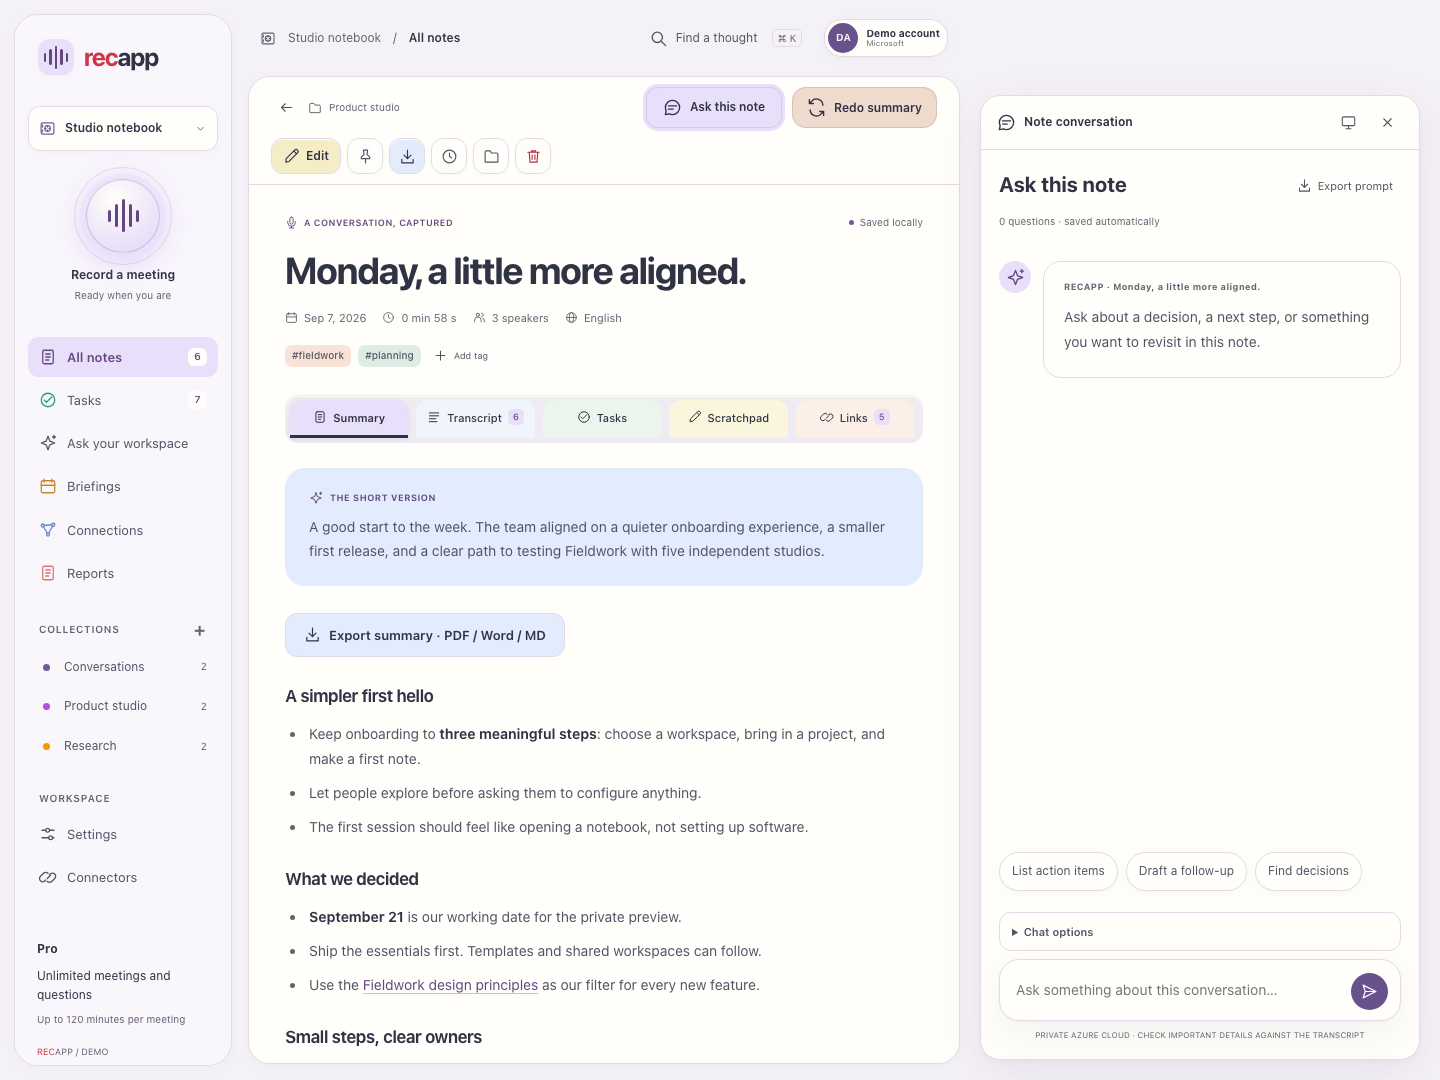
- Use the workspace selector to open a workspace. Free includes Personal; Pro adds other workspaces.
- In All notes, search for a title, phrase or tag. Use the collection and note filters, then open a result. Pin frequently used notes.
- Create a written note, choose its title and collection, and edit with the formatting controls or Markdown. Review unsaved changes before leaving.
- Use a note’s actions to rename, move, export or delete it. Move related files together through the app.
Deleting a note keeps source audio and transcripts for recovery. A full workspace backup includes attachments, transcripts and any recovery files, not just Markdown notes.
Back to top ↑03
Record and import audio
Choose a title and the destination workspace before capture. Let participants know you are recording and obtain the consent you need.
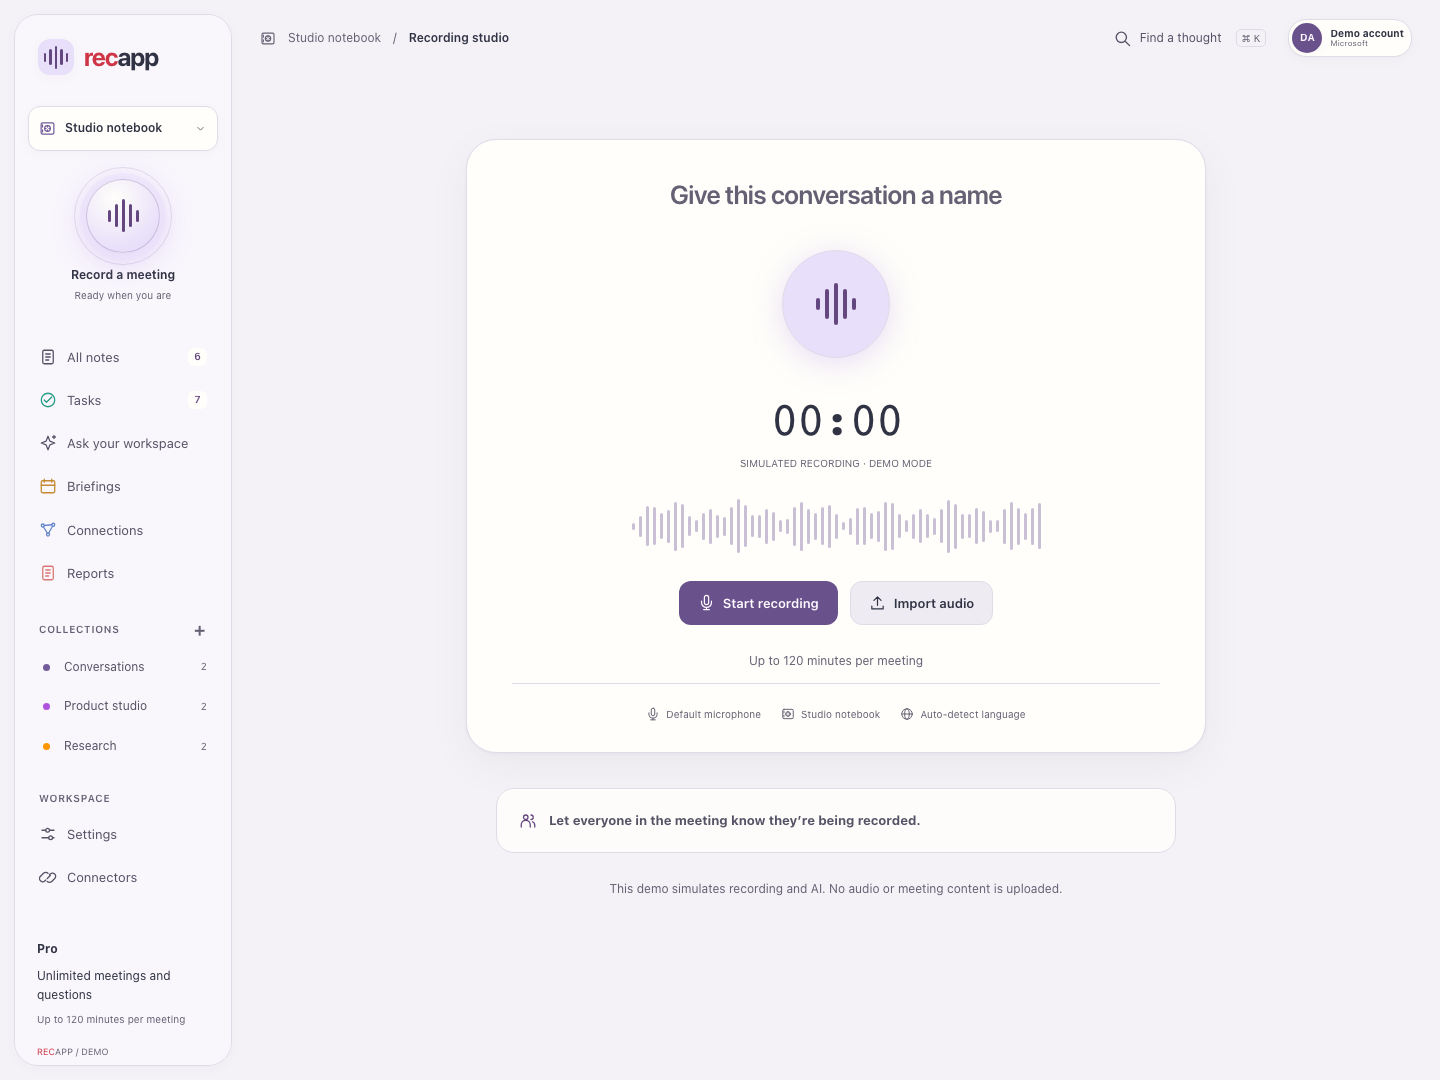
- Select Record. Confirm the workspace and title, then start recording. Grant microphone permission when asked.
- Pause to exclude a break and Resume to continue. You can leave the recording view; the recording indicator lets you return.
- Write private scratchpad notes during capture. They stay separate unless you explicitly include them in a summary.
- Stop and save to keep the recording. A recording flagged for review remains available for your decision. Discard only when you want to remove the capture.
- Use Import audio for an existing recording. Processing needs internet, sign-in and remaining plan allowance. Failed processing can be retried from the saved note.
Recordings during the free month and with Pro stop and save at two hours. After the free month, upgrade to record more meetings. Windows records default output and microphone. Mac system audio needs macOS 15.2+ and Screen & System Audio Recording permission. iPhone and Android use the microphone and generally cannot capture another app’s call through headphones.
Back to top ↑04
Screenshots and private scratchpad
An image can help explain a slide, diagram or screen discussed in a meeting.
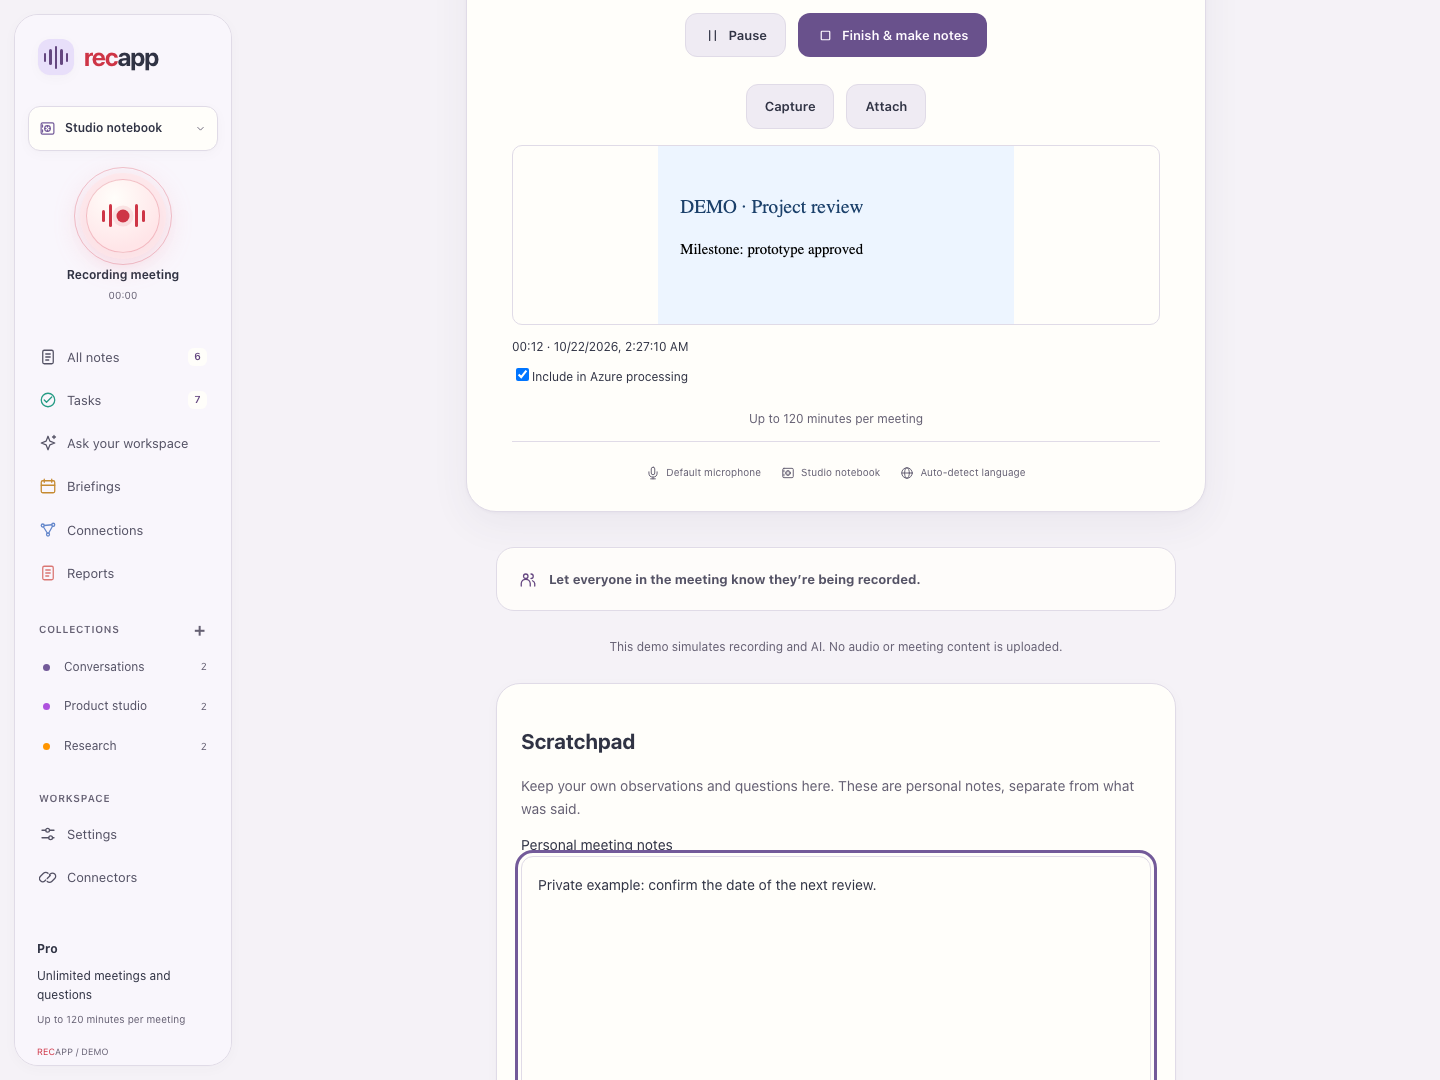
- During recording, Capture opens a region selection with the desktop app moved out of the way. Attach opens a PNG/JPEG. On mobile, take a screenshot with the device controls and attach it.
- Review each image. Include it in Azure processing only if you want its contents used; remove an image you do not need.
- You can attach up to eight images, each up to 4 MB. Open saved images from the note to inspect them.
- Use the scratchpad for your own observations. Choose whether it contributes to a summary; review the exact content before sharing.
Visual context is separate from spoken transcript. Included screenshots are sent to Azure, saved with the local note and travel with applicable workspace exports. Check for private information before including or exporting them.
Back to top ↑05
Review summaries, transcripts and speakers
Generated content is a draft. Check decisions, names, dates and tasks against the original conversation.
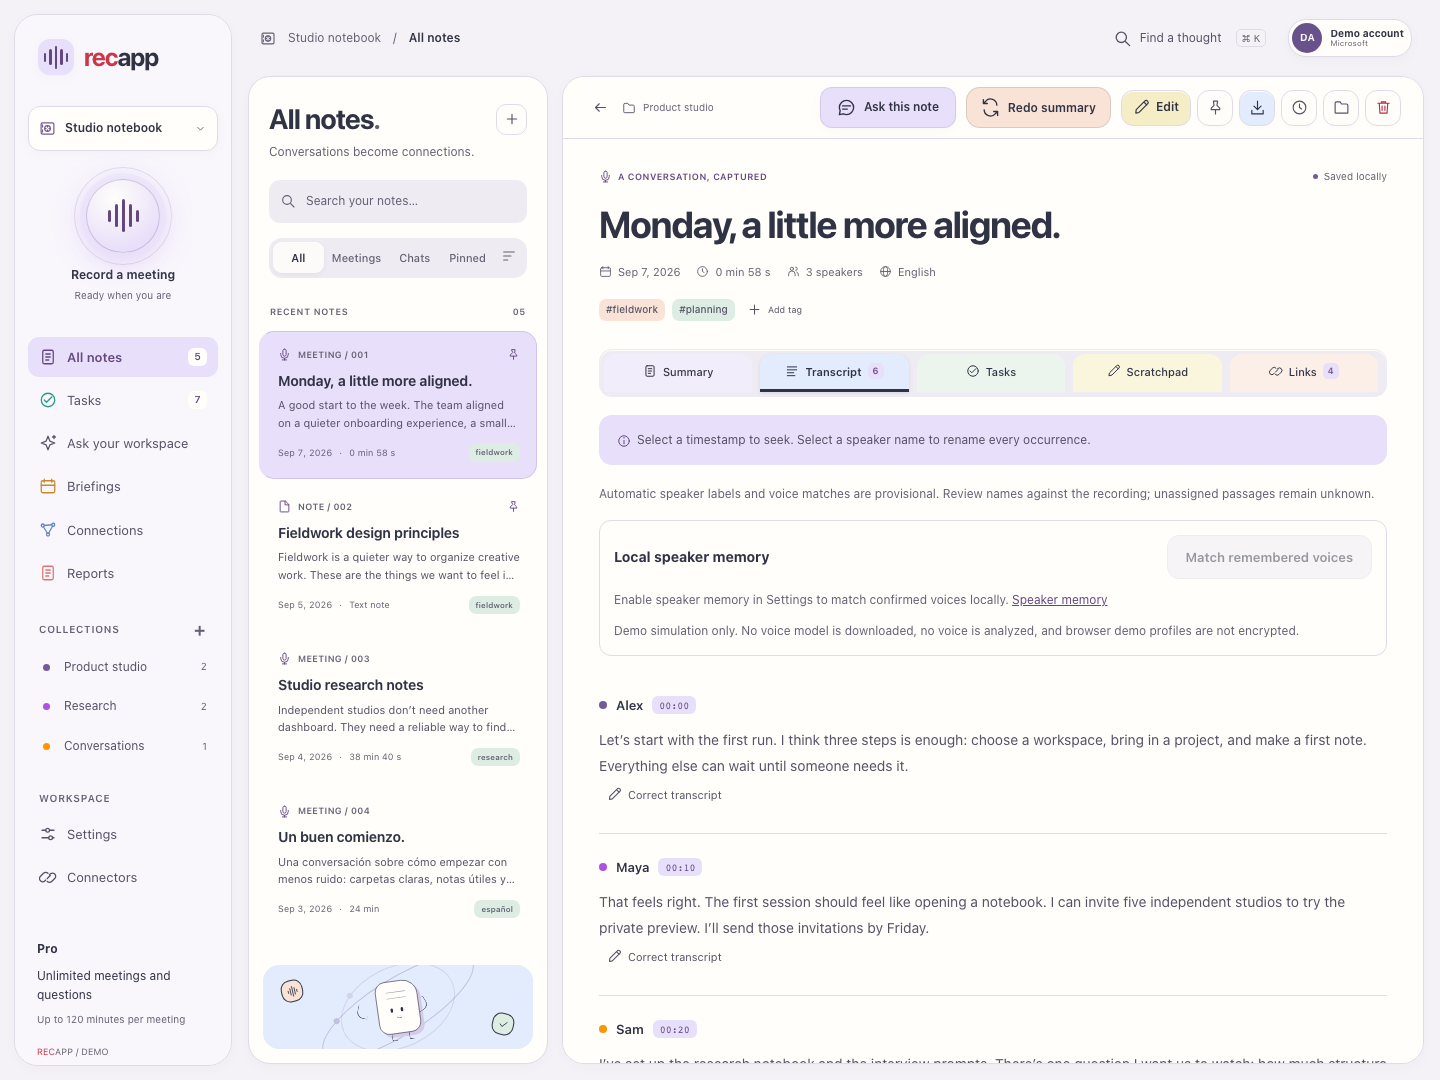
- Open a meeting note. Read its summary and switch to Transcript to check the source wording. Use playback and timestamps when audio is available.
- Rename speaker labels after listening to the voice. Calendar invitees are context; they do not prove who attended or spoke.
- Edit the summary with the editor. Generate a summary or tasks separately when needed. Regeneration lets you choose template, detail, language and the available processing model.
- Review earlier summary versions in history before restoring a draft. Keep task completion changes when rewriting summaries.
- If processing fails, keep the saved audio, review the error, reconnect to the internet and retry. Pause pending work if you need to defer processing.
Language preferences affect new generated content. Changing the interface language does not translate your existing notes. Do not close or delete source files while processing is using them.
Back to top ↑06
Ask a note or your workspace
Use chat to revisit decisions, find next steps or draft a follow-up from saved content.
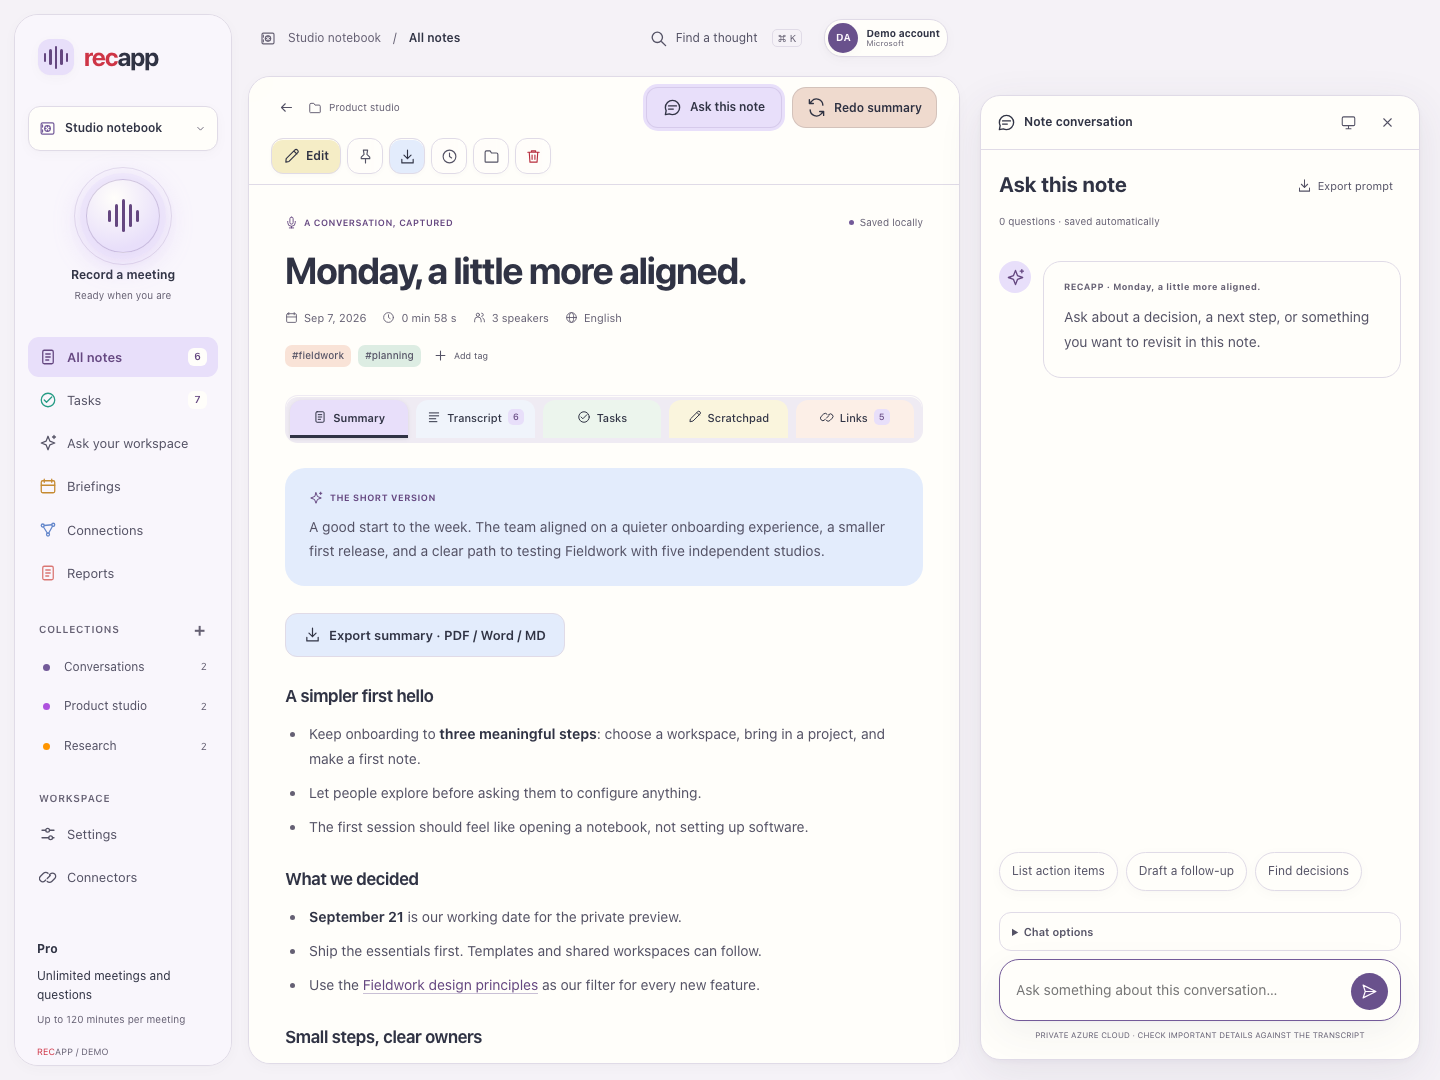
- Open a note and choose Ask this note. Write a specific question, such as “Which decisions still need an owner?”
- Choose an available chat model and whether related notes can contribute. Review citations to open the supporting note, transcript passage or image.
- Workspace chat searches the accessible notes in the chosen scope. Narrow the question when the source material is broad.
- Conversations are saved locally. Export a prompt or reviewed answer when useful; drafting a follow-up does not send it.
Free includes three questions per meeting; Pro has unlimited meeting questions. Answers depend on the sources found. Check the cited evidence before acting on an answer.
Back to top ↑07
Tasks and follow-through
Tasks come from saved notes and remain connected to their source.
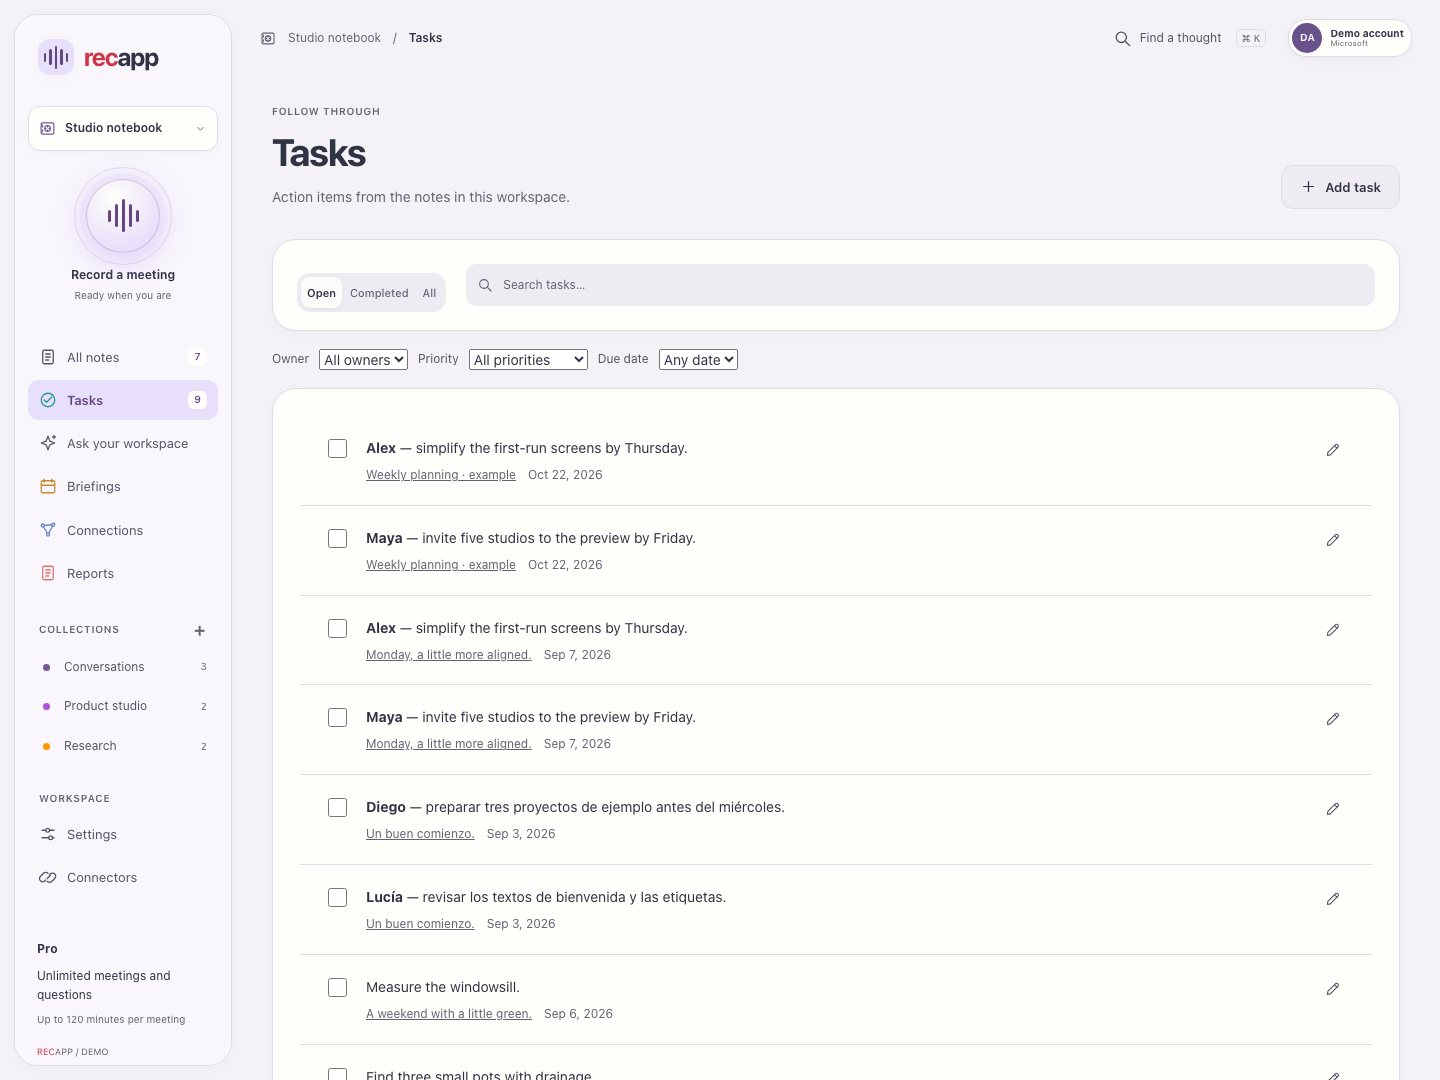
- Open Tasks. Choose Open, Completed or All, then search or filter by owner, priority or overdue date.
- Open a task’s source note to review its context. Add or edit a task with a clear owner, due date and priority when known.
- Mark tasks complete as the work is done. Changes update the saved note; deleting or changing a task affects the local source.
- Generate tasks independently of a summary. Review inferred commitments before accepting them.
Completing a Recapp task does not update an external project tracker. Send reviewed tasks through a configured workflow when you want another system to receive them.
Back to top ↑08
Tags, links and Connections
Connections show real relationships between your notes, collections and shared tags.
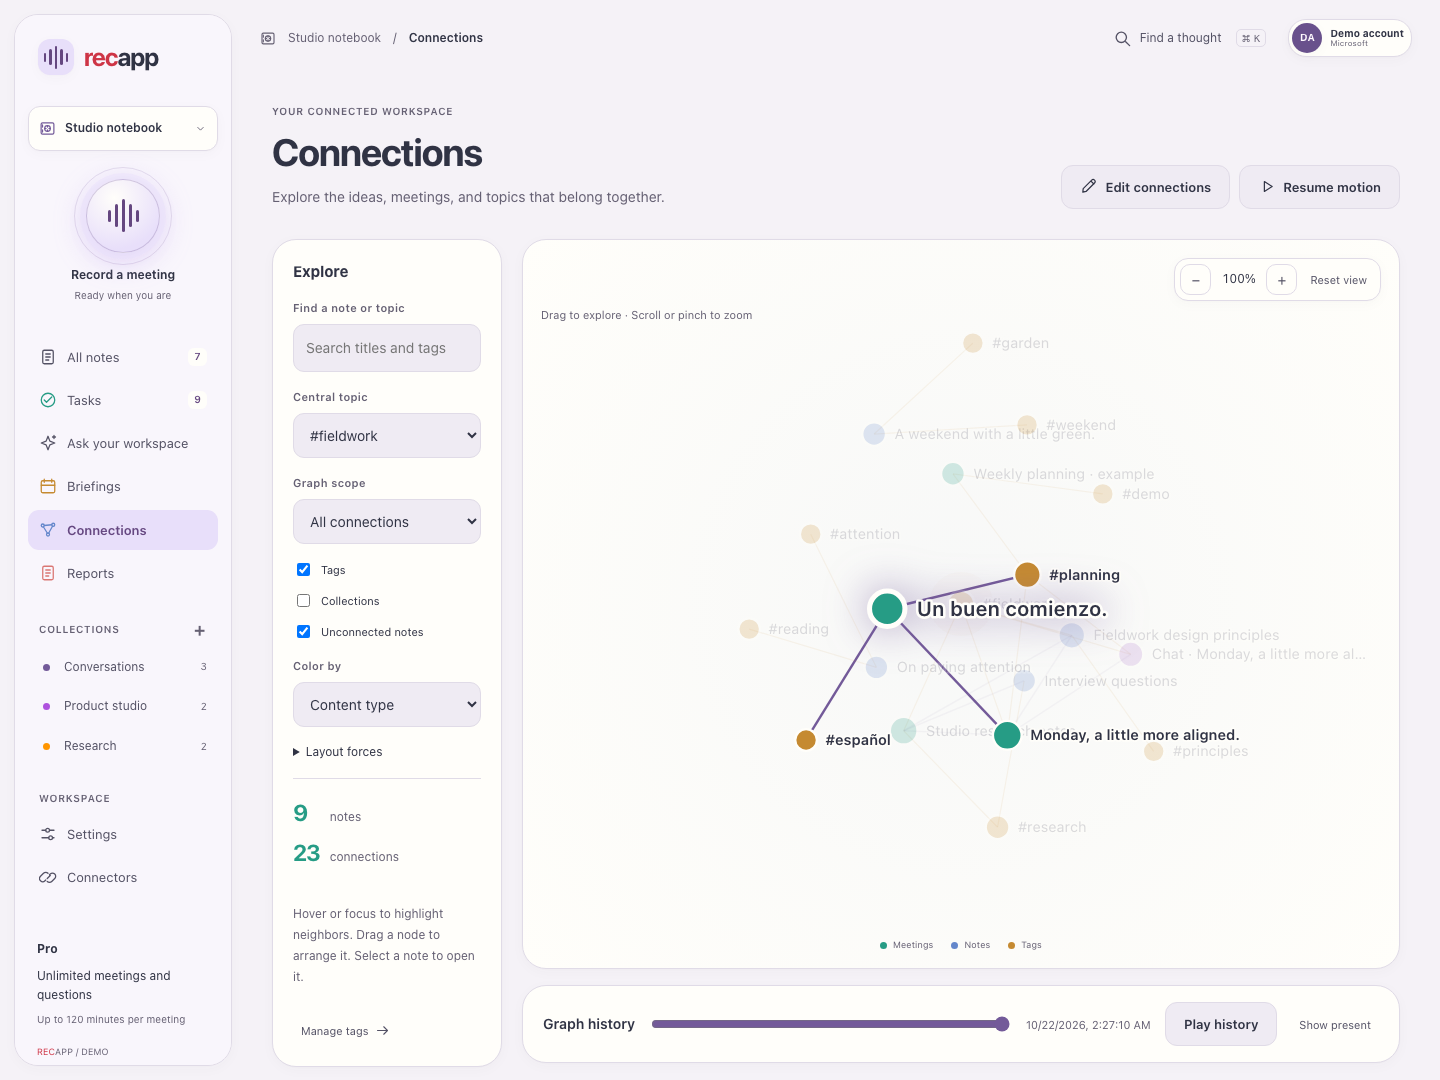
- Add tags to a note, accept useful suggestions and link related notes. Use Settings → Tags manager to maintain your vocabulary.
- Open Connections and choose a central topic: tag, note, collection or workspace. Select a node to open its note.
- Pan, scroll, pinch or use zoom controls to inspect the graph. Fit the view when you lose your place; motion is optional.
- Use filters, history and connection editing to review relationships. Unconnected notes remain separate.
A line shows a saved link, shared tag or other supported relationship. It does not prove that one meeting caused another.
Back to top ↑09
Reports and activity
The dashboard describes saved activity. Pro can turn matching summaries into an editable report.
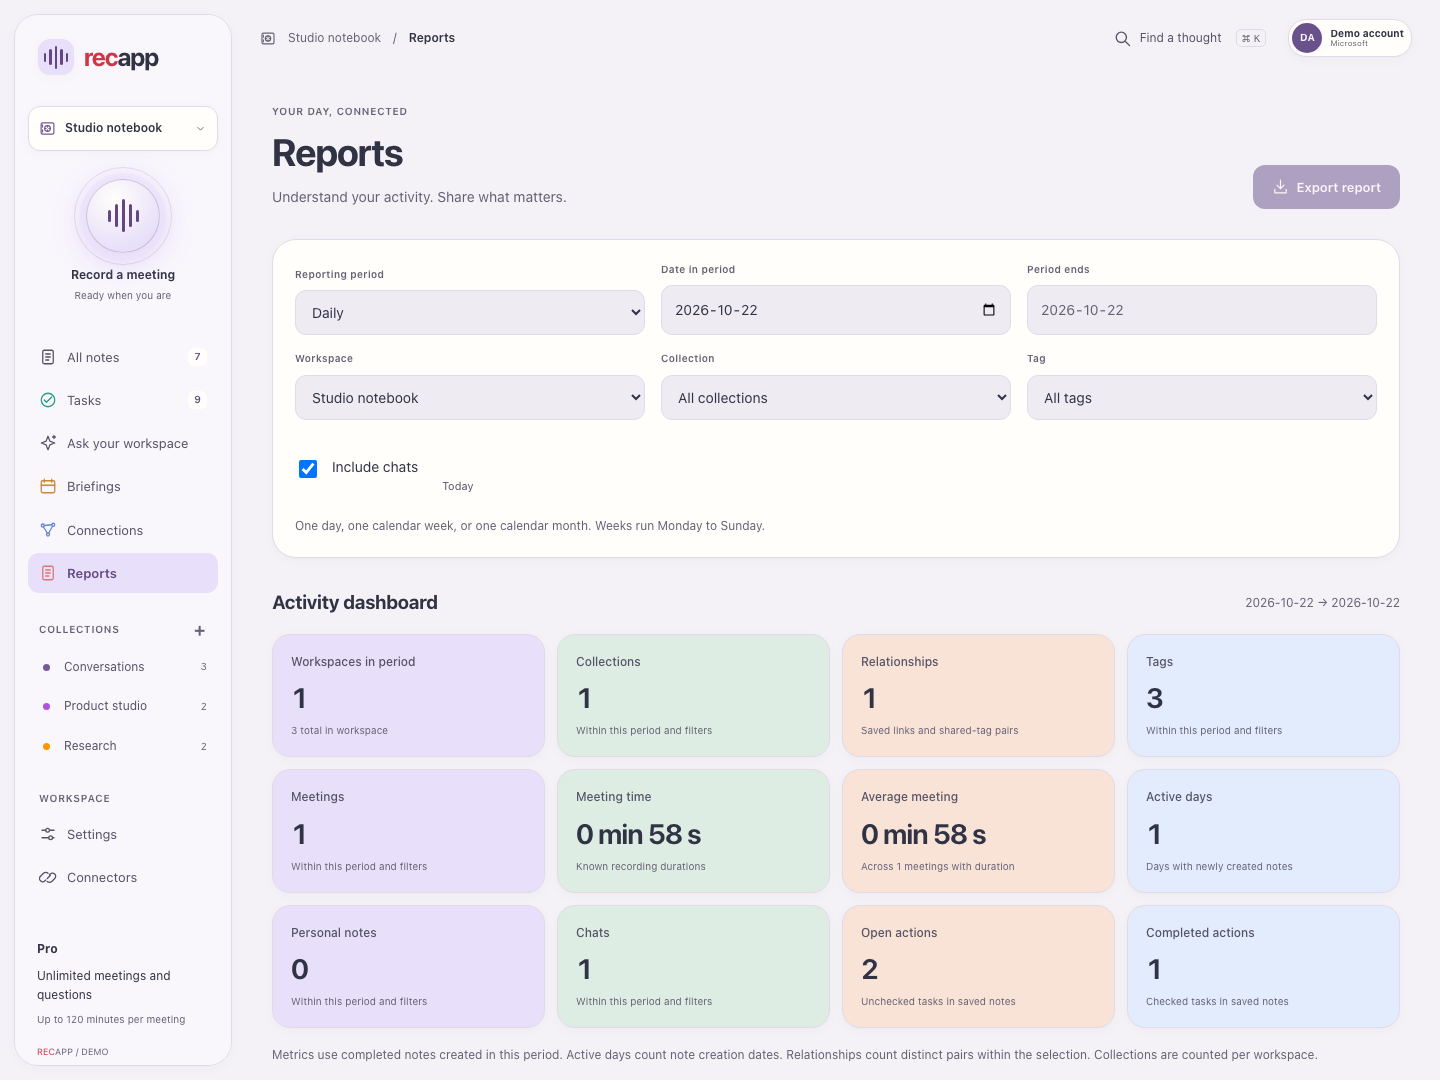
- Open Reports. Choose Daily, Weekly or Monthly and an anchor date. Weeks run Monday–Sunday; months follow calendar boundaries.
- Select workspace scope, collection and exact tag. Choose whether saved chats are included. Review totals and source coverage.
- Choose a report template and detail, then generate a shareable summary. Reports use saved summaries; they do not transcribe the audio again.
- Review and edit the draft before copying or exporting PDF, Word or Markdown. Regenerate after changing scope or when sources change.
Unavailable workspaces can block generation. Large reports are processed in batches; coverage and any unavailable sources are shown. Activity totals are not a measure of time spent using the app.
Back to top ↑10
Google and Outlook calendars
Pro calendars are read-only connections, separate from your Recapp sign-in.
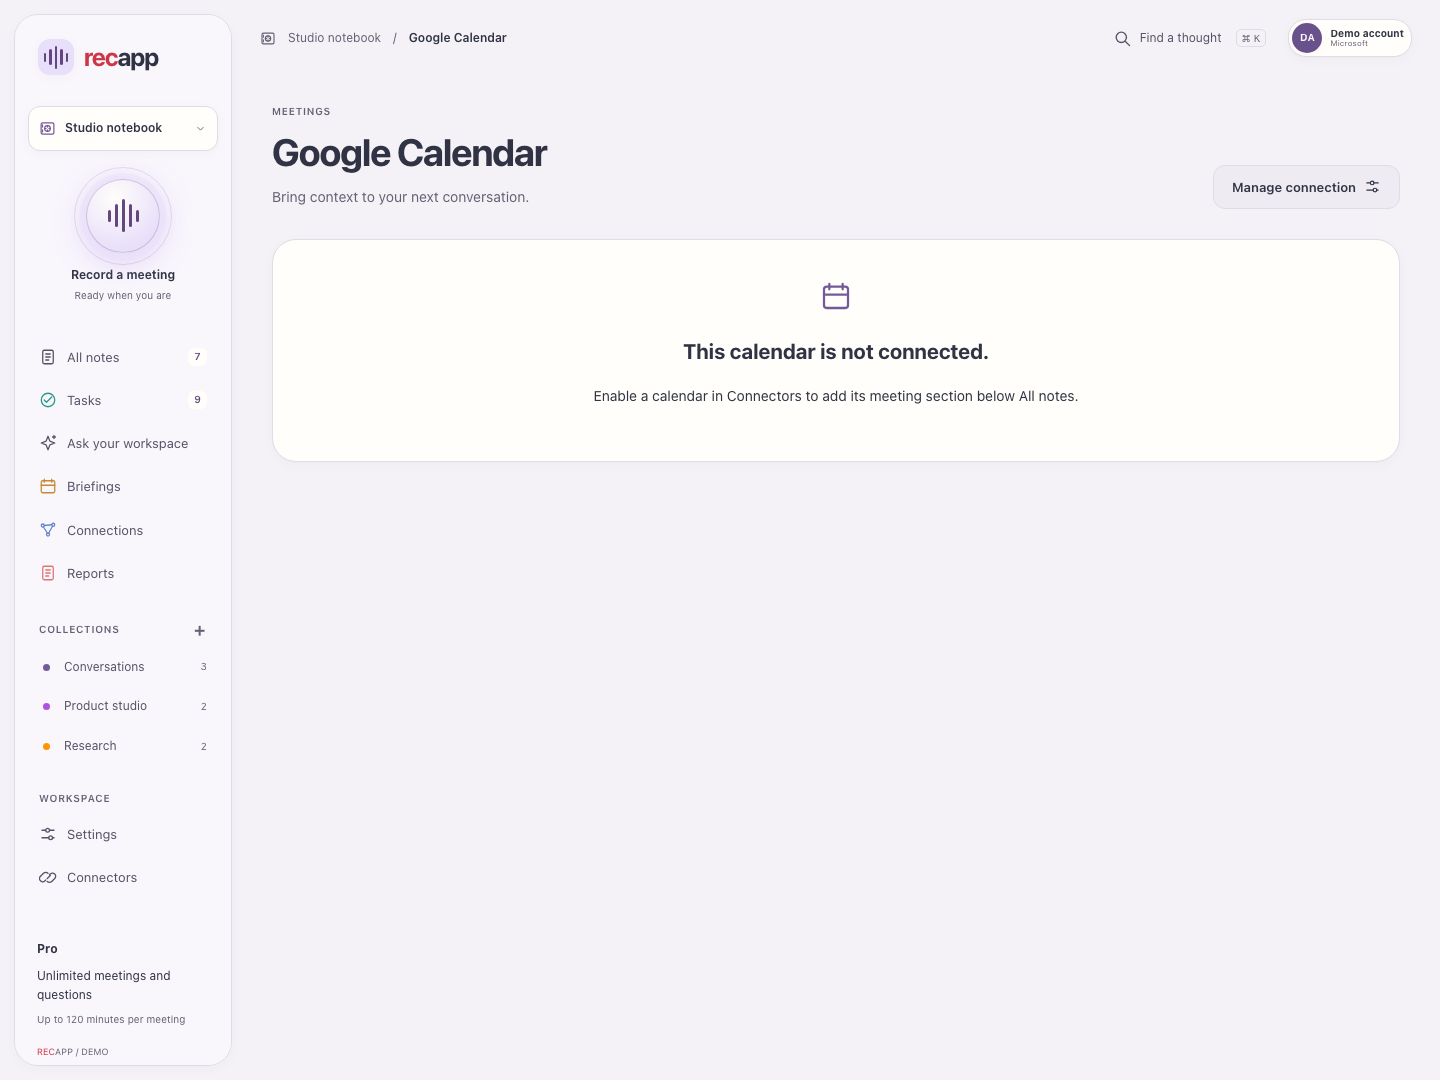
- Open Connectors and select Google Calendar or Outlook Calendar. Connect an account and review the provider’s requested permissions.
- Select the calendars to display and save your choice. You can connect multiple accounts; the app permits up to 20 accounts and 10 calendars per account.
- Refresh the calendar, inspect a meeting, then join, start a recording, prepare a note or ask about the meeting.
- Review participant context before processing. A recording-notice email opens as an editable draft; review recipients and send it yourself.
- Reconnect if access expires. Disconnect an account when no longer needed and remove provider consent if required. Organization administrators may need to approve access.
Recapp cannot modify calendar events. It does not read your mailbox. Invited people do not prove attendance, and a notice email does not replace recording consent.
Back to top ↑11
Prepare meetings and a daily briefing
Briefings bring selected calendar meetings, related local notes and open tasks together before a conversation.
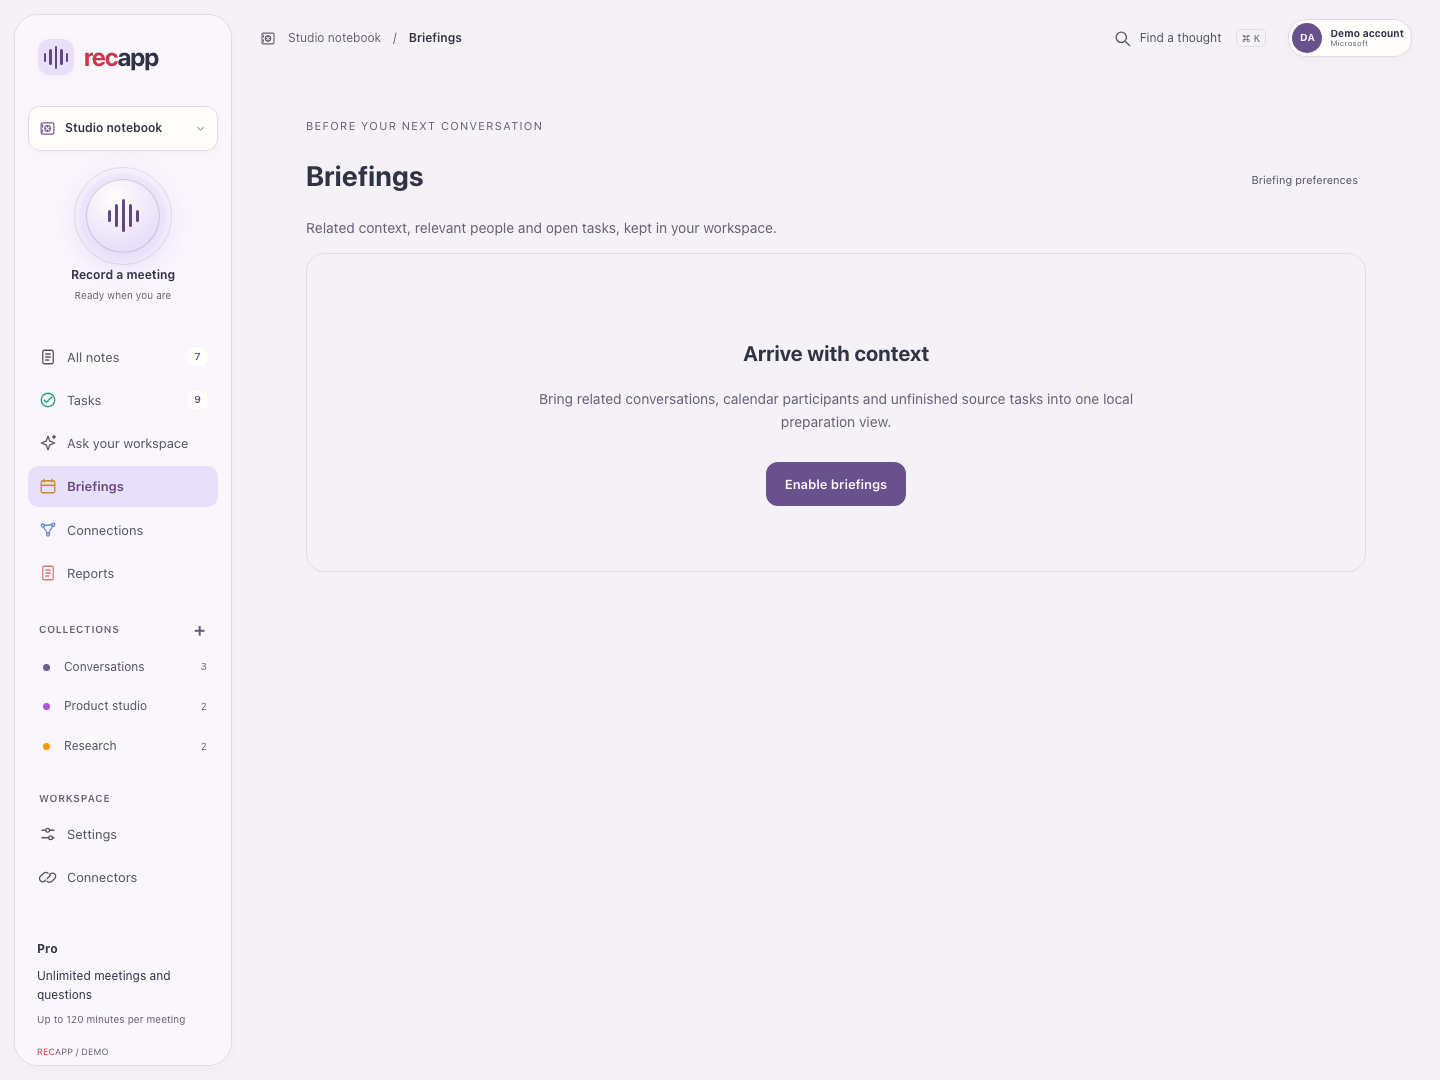
- Enable briefings in Settings → Briefings and connect an eligible calendar. Choose all meetings or external meetings and unknown participants.
- Open Briefings and select a meeting to review people, related conversations, open tasks and the suggested agenda.
- Prepare a meeting briefing or the daily briefing. Open the saved note and edit it to suit your needs.
- Refresh calendars when needed. If sources change, review the stale indication and explicitly update the saved briefing; the previous draft stays in history.
Preparation stays local and changes only when requested. Recapp does not send daily briefing emails. Missing identities remain included for review rather than being assumed internal.
Back to top ↑12
Export, share and back up
Choose exactly what leaves your workspace and review the result before sending it.
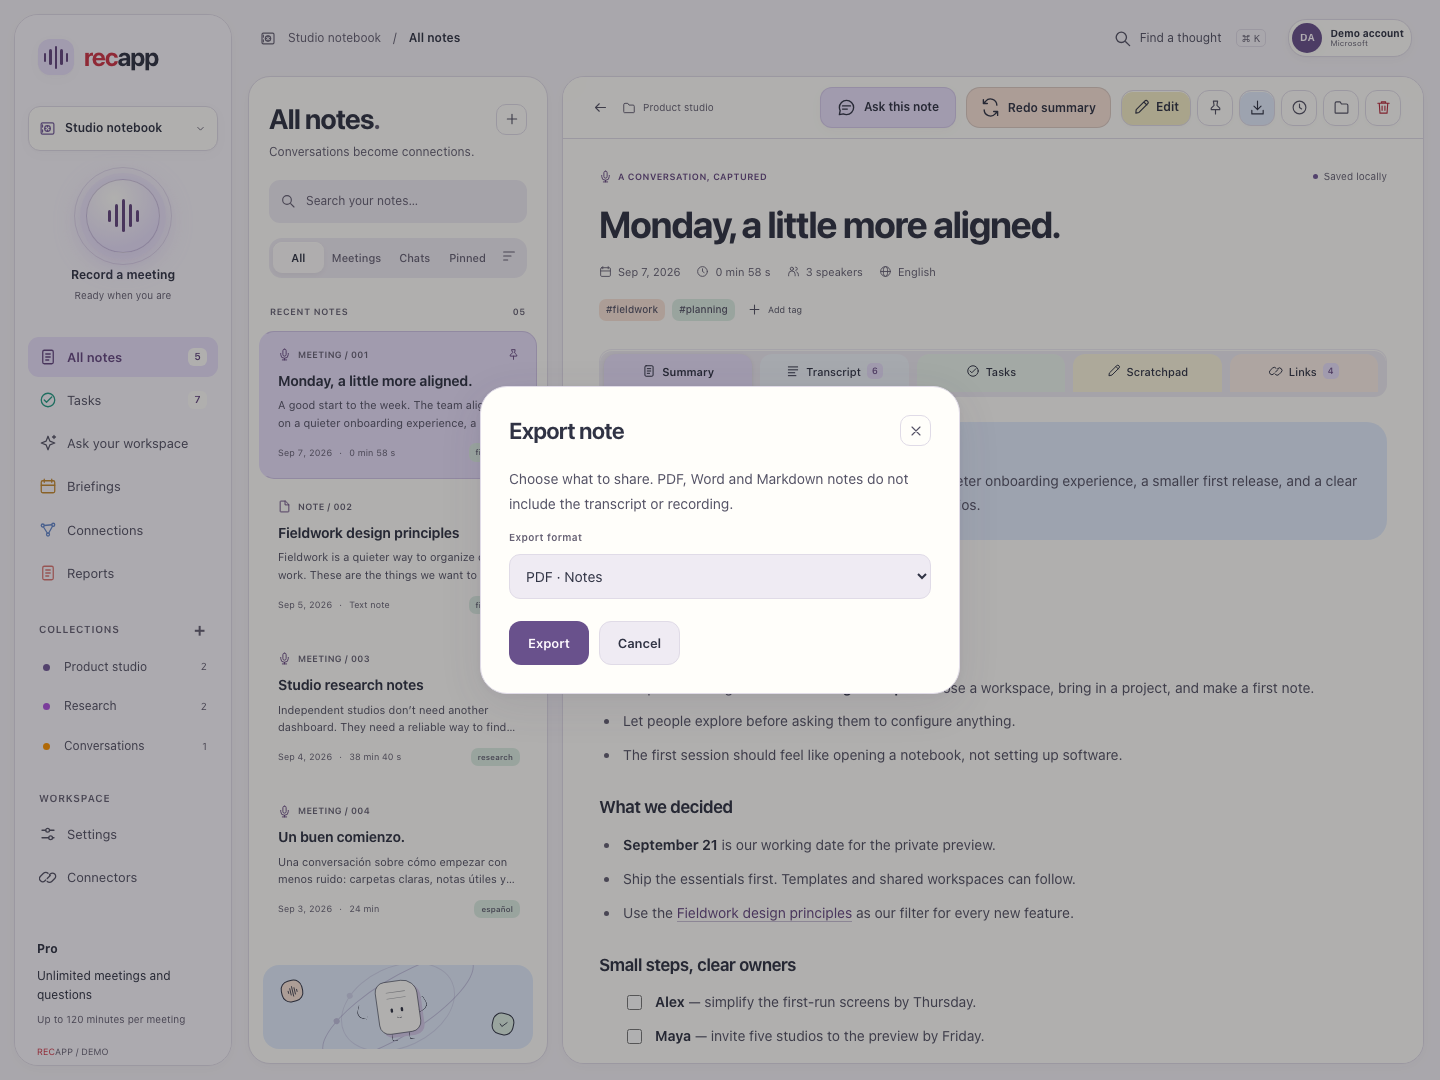
- Use a note’s Export action. Choose Markdown, Word or PDF for the note, or explicitly choose transcript or audio when those are needed.
- Reports can be exported as PDF, Word or Markdown. Review the edited report and its scope first.
- Use the device’s share or save dialog to choose a destination. Exporting does not email a document automatically.
- Use Settings → Workspace to export the current workspace. Keep backups of the full folder and test that notes and attachments are readable.
Note PDFs do not automatically include original audio or the full transcript. Exported files, system share caches and your backups may persist after you delete a note. Pro can turn Recapp attribution off.
Back to top ↑13
Send a reviewed workflow export
Pro can send a selected summary or tasks to an HTTPS webhook in Power Automate, Zapier, Make, n8n or your own service.
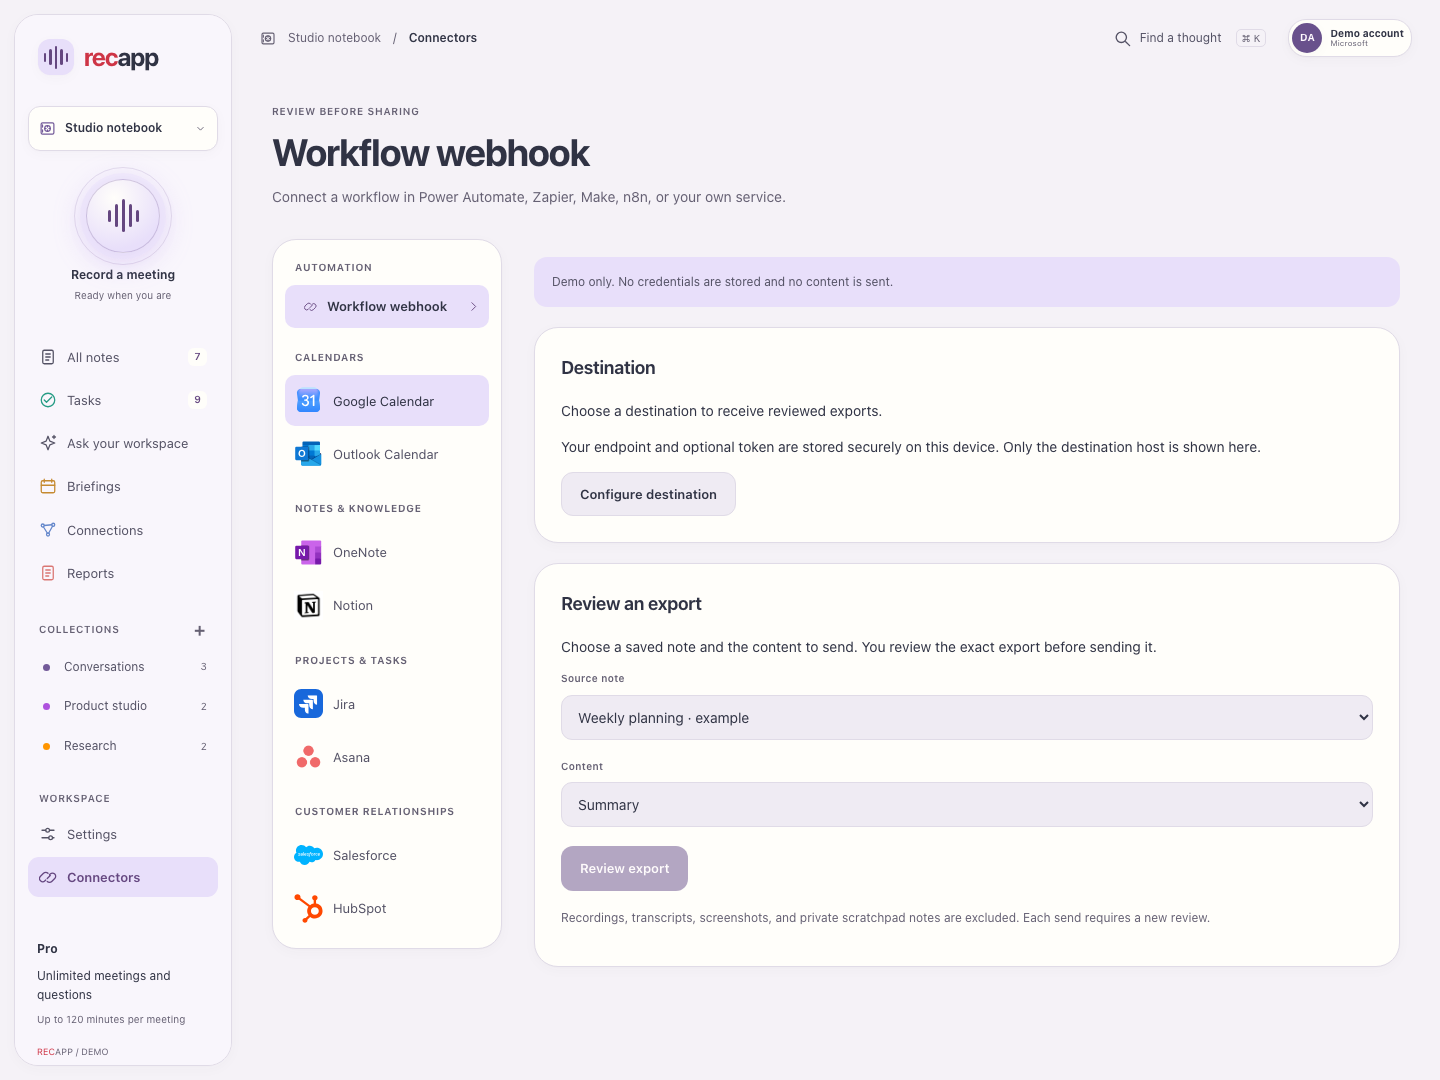
- Open Connectors → Workflow webhook and configure a destination. The endpoint and optional token are saved securely on the device.
- Choose a saved note and Summary or Tasks. Select Review export.
- Read the exact payload, confirm the destination host and send only when it is correct. Every send requires a new review.
- Change the destination or disconnect it when needed.
Recordings, transcripts, screenshots and private scratchpad are excluded from this export. OneNote, Notion, Jira, Asana, Salesforce and HubSpot cards marked Coming soon are setup previews, not live integrations.
Back to top ↑14
Settings → Account
Manage sign-in separately from your local files.
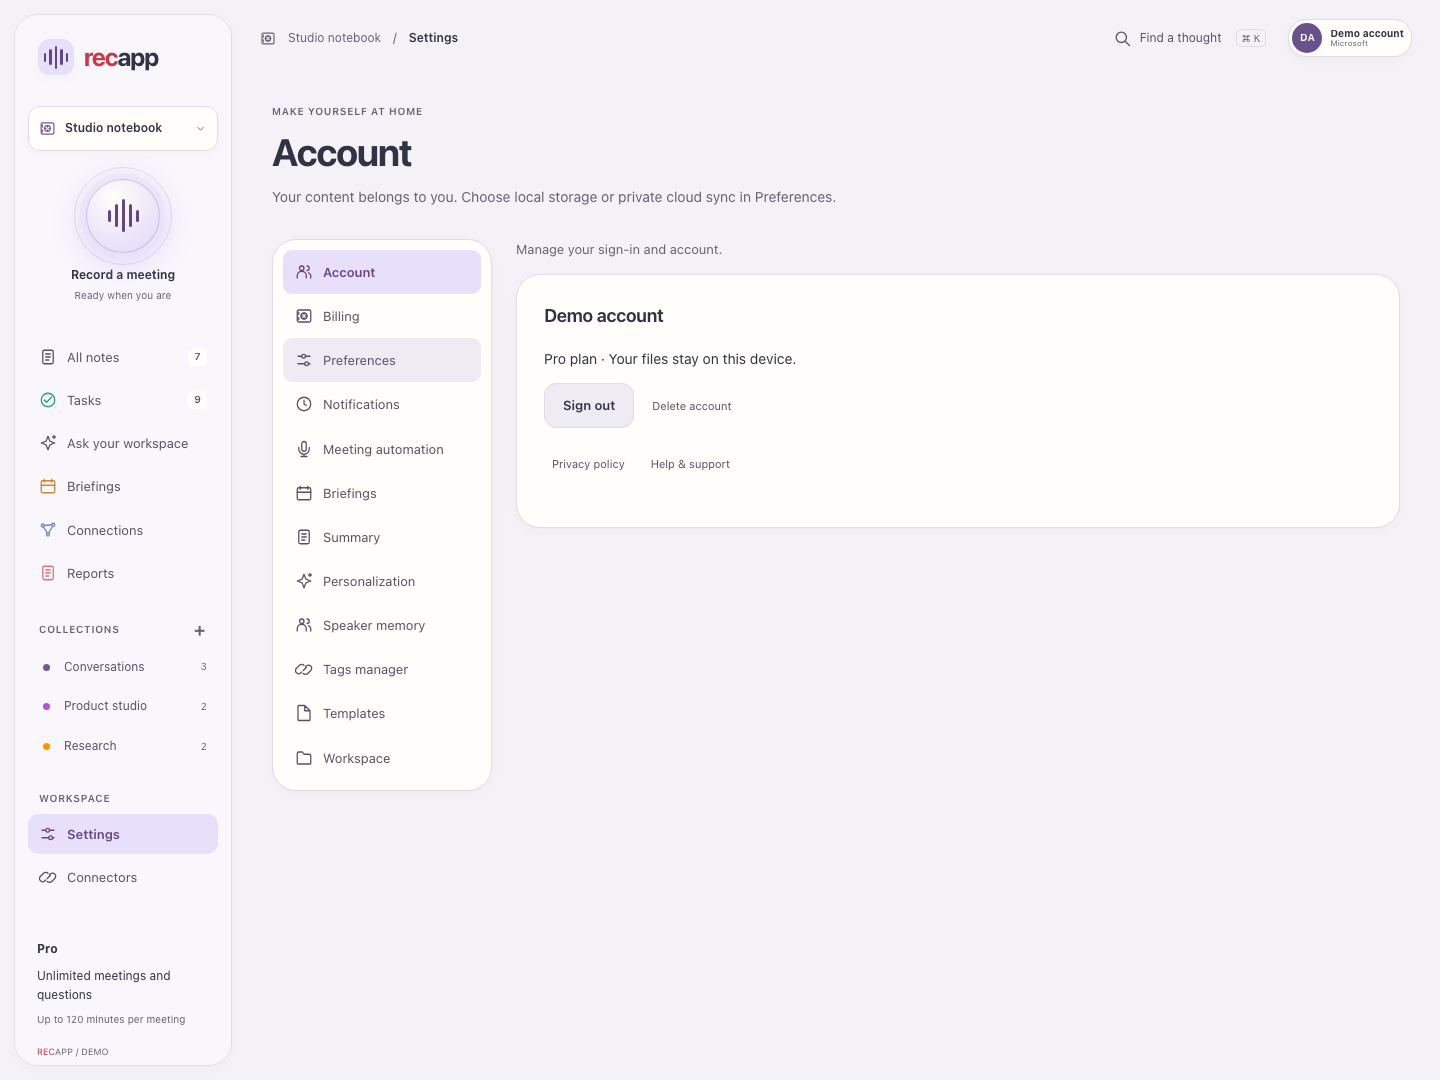
- Review the current account and sign-in provider. Sign out to lock access to the workspace on this device.
- Use Delete account when you want the account profile and sessions removed. Read the confirmation before continuing.
- Open Privacy policy or Help & support from this panel when needed.
Signing out or deleting an account does not delete your local notes, recordings, backups or exports. Cancel a subscription separately with its payment provider.
Back to top ↑15
Settings → Billing
Review your free month and subscription status.
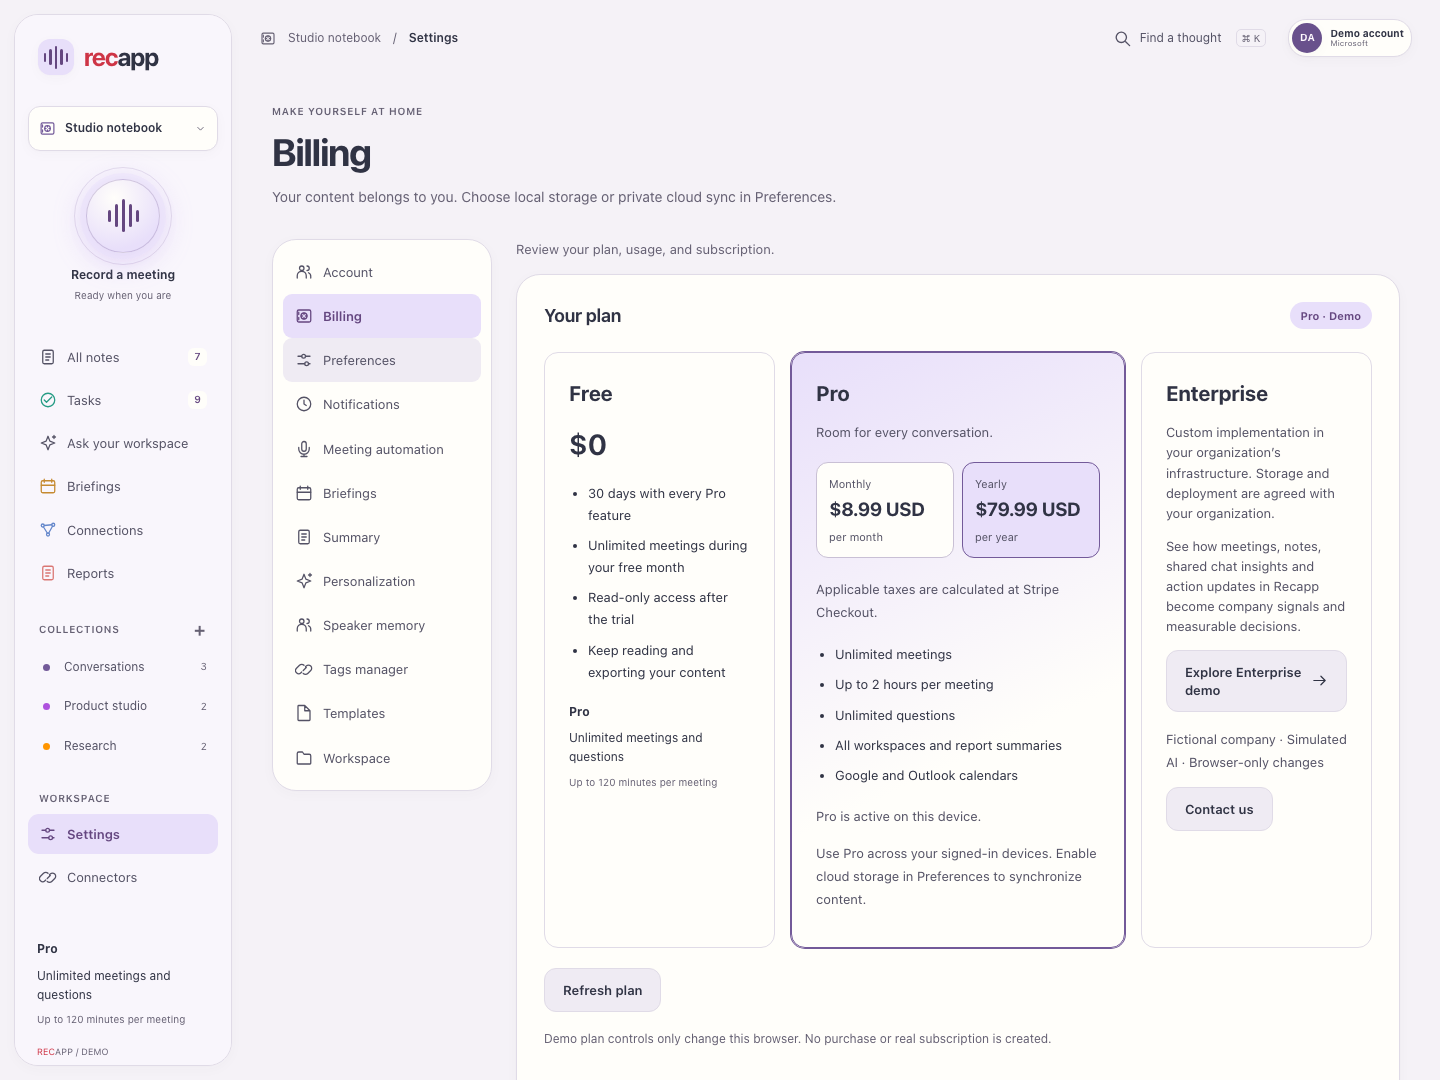
- Your first 30 days include every Pro feature and unlimited meetings. Afterward, read and export all your content; upgrade to record, edit or use AI. There is no automatic charge when the free month ends.
- Choose Monthly or Yearly for Pro and use the available secure checkout. Pro includes meetings up to two hours, unlimited meeting questions, more workspaces, report summaries and supported connectors.
- Refresh plan after a purchase. Manage or cancel with Stripe or the App Store. On iPhone, Restore purchases checks an existing purchase.
- If Pro is active elsewhere, choose Activate Pro on this device and review the transfer. Redeem an eligible access code where the control is offered. Contact support for Enterprise.
Pro works across signed-in devices; cloud sync is optional. Activating another device does not copy your files. Demo plan changes and payments are simulated.
Back to top ↑16
Settings → Preferences
Choose the interface language and appearance independently of your note content.
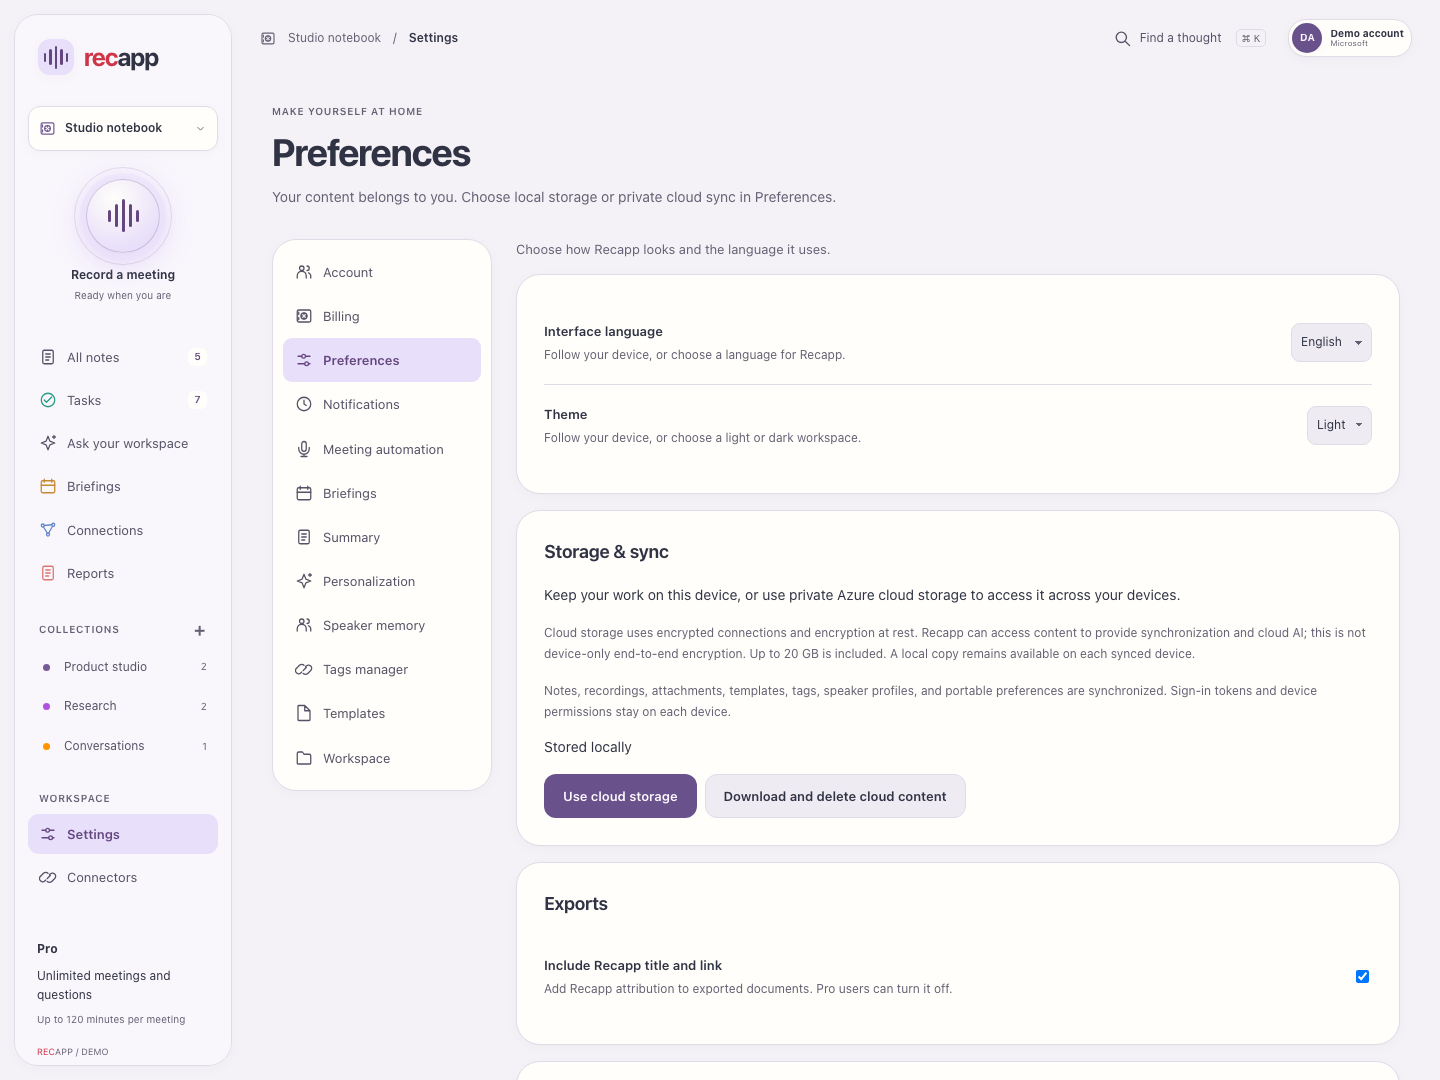
- Interface language: Auto follows the device; English and Español are explicit choices. Unsupported device languages fall back to English.
- Theme: Auto follows the device; Light and Dark stay selected until you change them. This manual uses Light.
- Preferences shows storage and sync, Diagnostics, and version/build with the available update check. Review What’s new or replay the app tour from the app’s help controls.
Summary language is a separate setting. Your written text, speaker names and existing notes are not translated when you change the interface.
Back to top ↑17
Settings → Notifications
Choose which app events use local system notifications, then Save preferences.
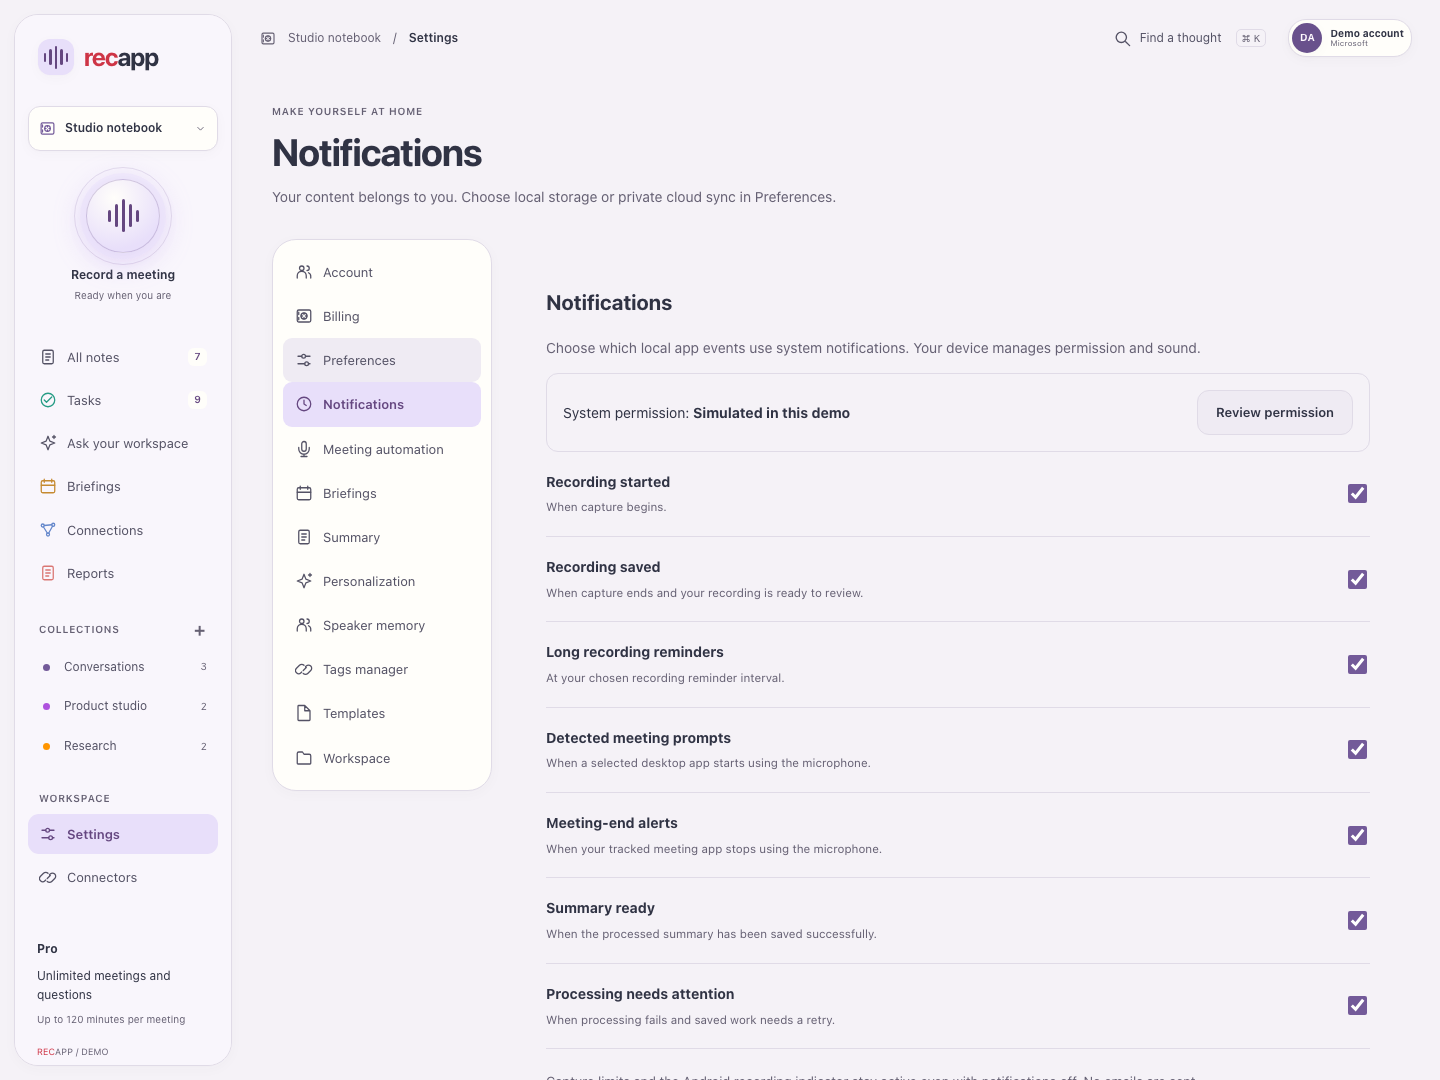
- Review permission to manage notifications in your device settings. The operating system controls sound and delivery.
- Turn Recording started, Recording saved and Long recording reminders on or off.
- Choose Detected meeting prompts and Meeting-end alerts for supported meeting detection.
- Choose Summary ready and Processing needs attention to hear about saved results or work that needs a retry.
Turning off notifications does not remove duration limits or Android’s recording indicator. These settings do not send email.
Back to top ↑18
Settings → Meeting automation
Supported Windows and Mac devices can notice selected apps using the microphone.
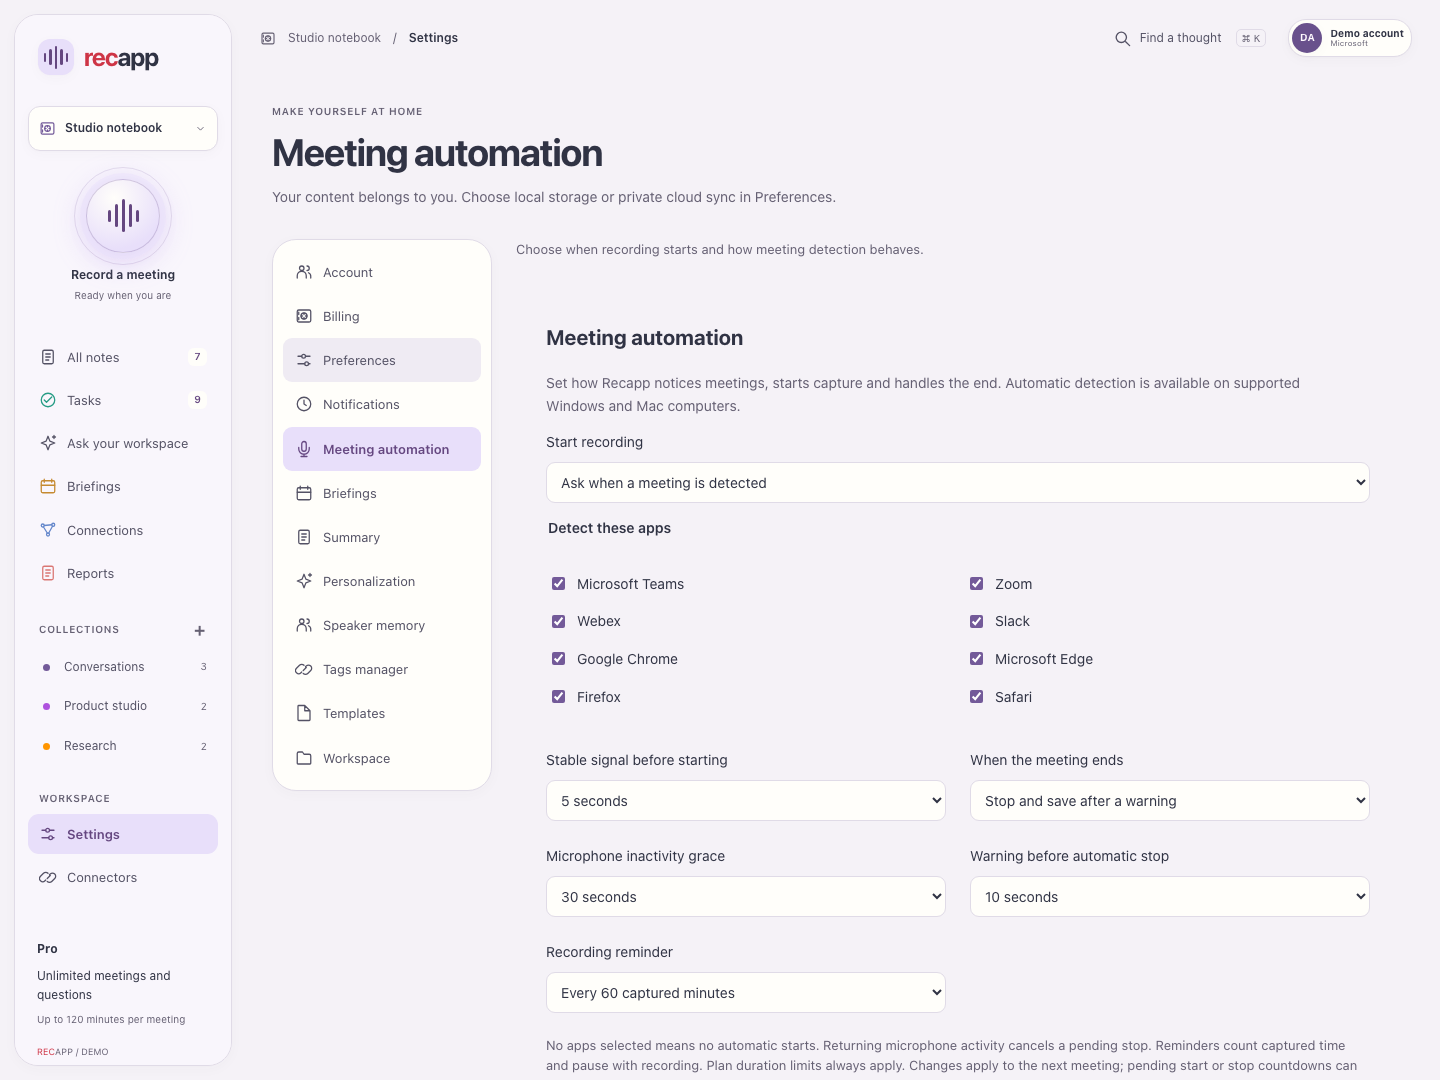
- Start recording: choose manual recording, ask when a meeting is detected, or start automatically. Choose which supported apps to detect.
- Browser meetings are included by default. Select or deselect each browser with the other apps. Set a stable signal delay before starting.
- When the meeting ends: finish manually, receive an alert and keep recording, or stop and save after a warning.
- Set microphone inactivity grace, warning countdown and recording reminder interval. Save preferences. Cancel a pending start or stop when the detection is wrong.
No selected apps means no automatic starts. Returning microphone activity cancels a pending stop. Reminders repeat at the selected interval of captured time; pauses do not count. Changes apply to the next meeting; plan limits still apply.
Back to top ↑19
Settings → Briefings
Choose whether calendar-based preparation appears and which meetings it covers.
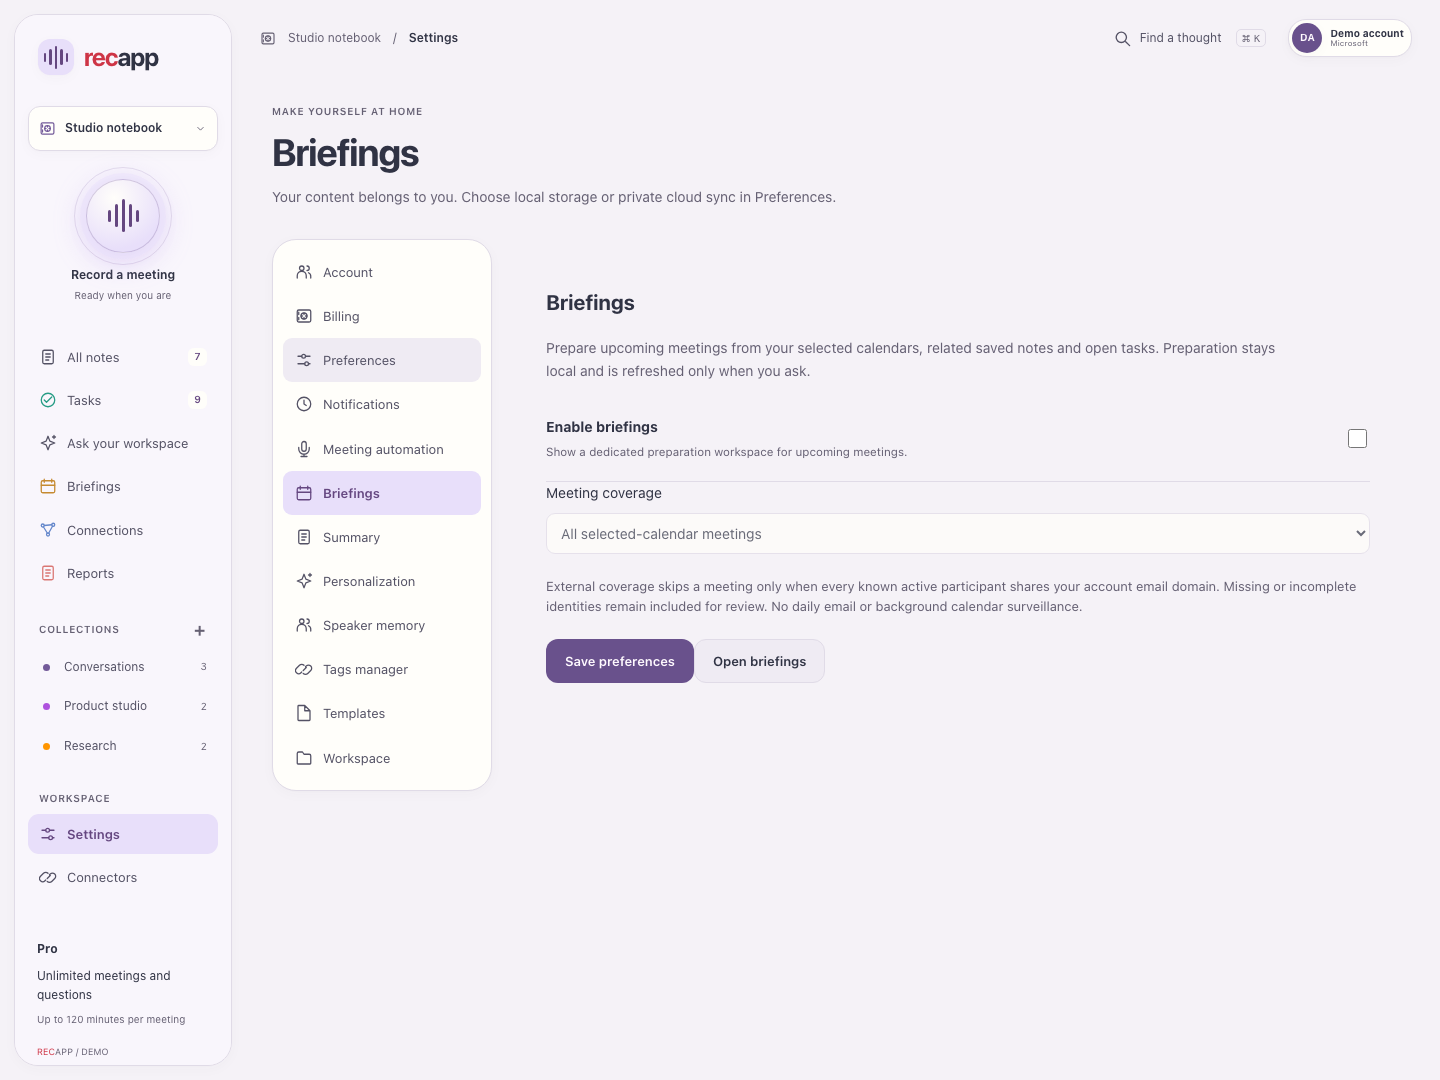
- Enable briefings to show the dedicated preparation workspace. This needs Pro and a supported connected calendar.
- Meeting coverage: choose all selected-calendar meetings or external meetings and unknown participants.
- Save preferences, open Briefings and prepare or update the note when ready.
External coverage skips a meeting only when all known active participants share your account’s email domain. Incomplete identities stay available for review. No daily email is sent.
Back to top ↑20
Settings → Summary
These defaults apply to new summaries and tasks; you can choose again when regenerating a note.
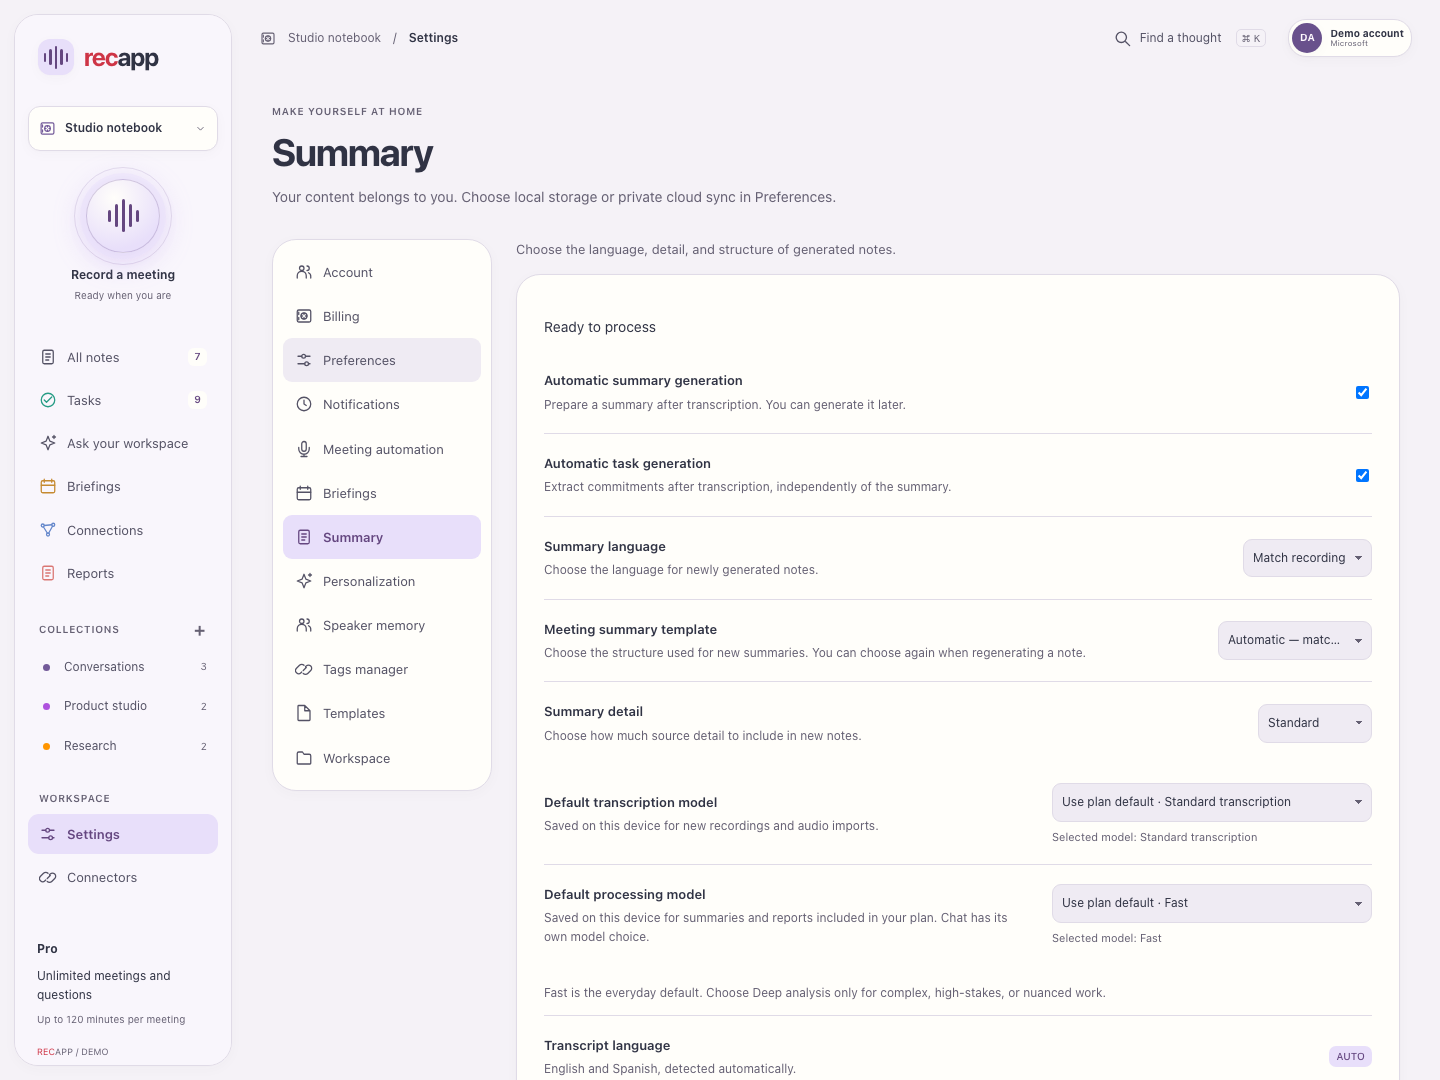
- Automatic summary generation and Automatic task generation are independent switches. Turn either off to generate it later.
- Summary language: match the recording, English or Español. Transcript language is detected automatically for supported English/Spanish speech.
- Choose a meeting summary template and Concise, Standard or More detailed. Automatic template selection follows the meeting’s apparent purpose.
- Choose an available default transcription model and processing model, or use the plan default. The app identifies the selected model and available choices.
Model availability depends on your plan and the service. Chat has its own model choice. Changing a default does not rewrite an existing note.
Back to top ↑21
Settings → Personalization
Custom vocabulary helps transcription recognize names, acronyms and specialist terms.
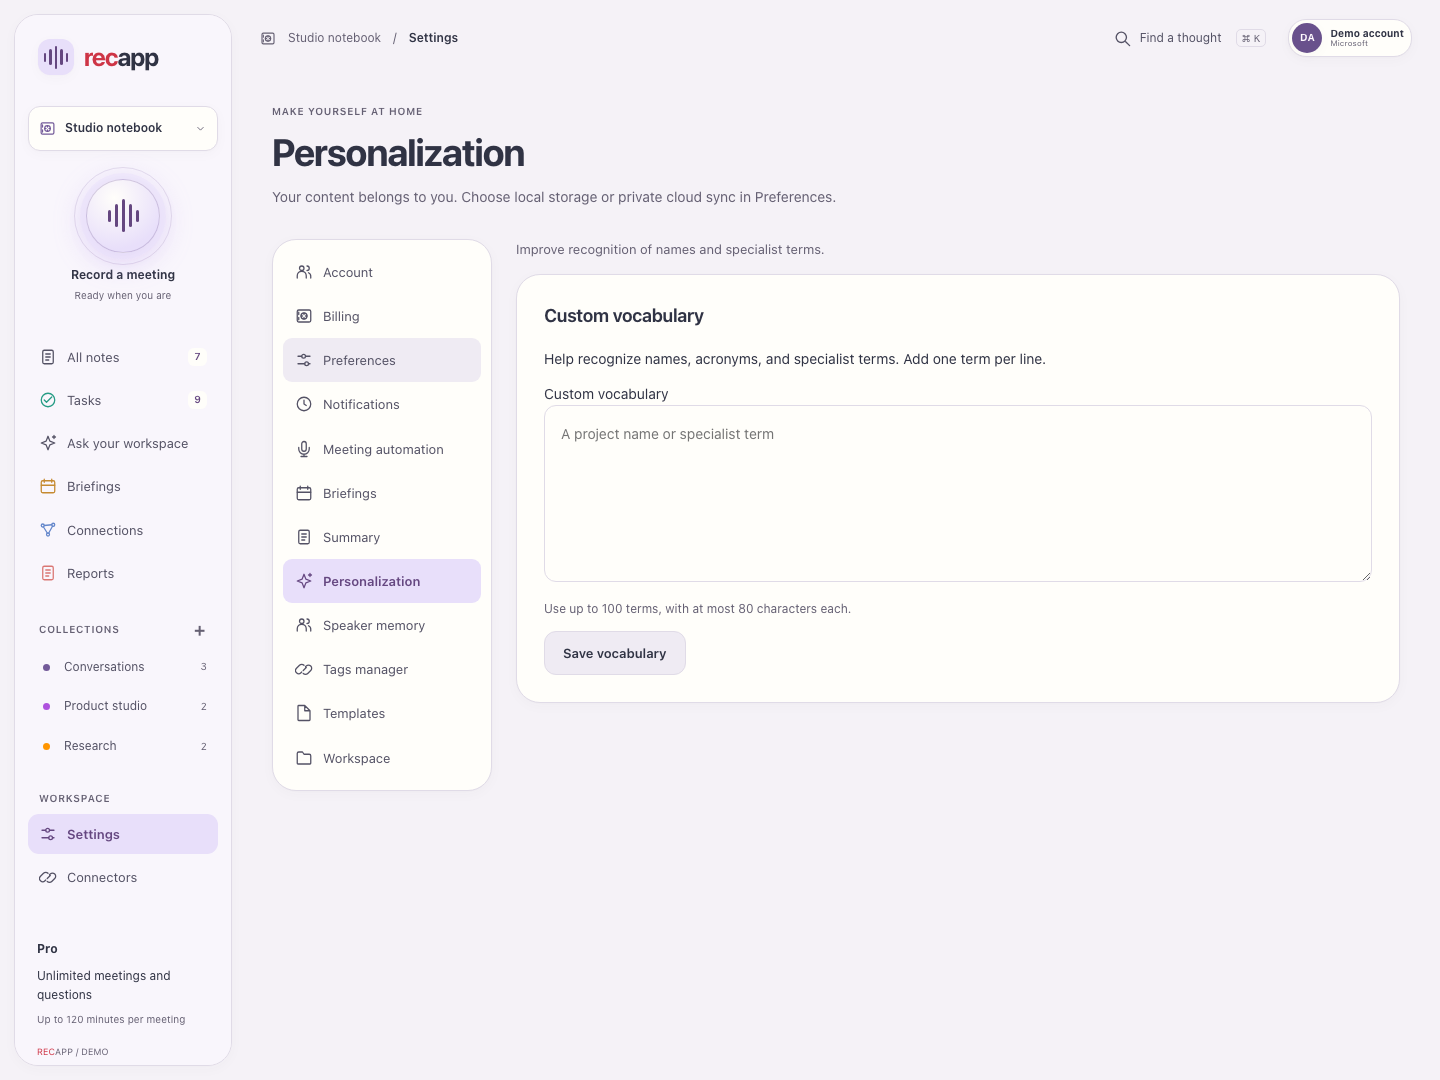
- Enter one term per line, such as a product name or technical acronym.
- Use up to 100 terms, each at most 80 characters. Save vocabulary.
- Correct the transcript when recognition is wrong. Update the vocabulary for future processing.
Vocabulary is a recognition hint, not a guarantee. Terms can be sent with the selected transcription request, so include only what you intend to share for processing.
Back to top ↑22
Settings → Speaker memory
Optional voice matching remembers speakers you confirm in this workspace.
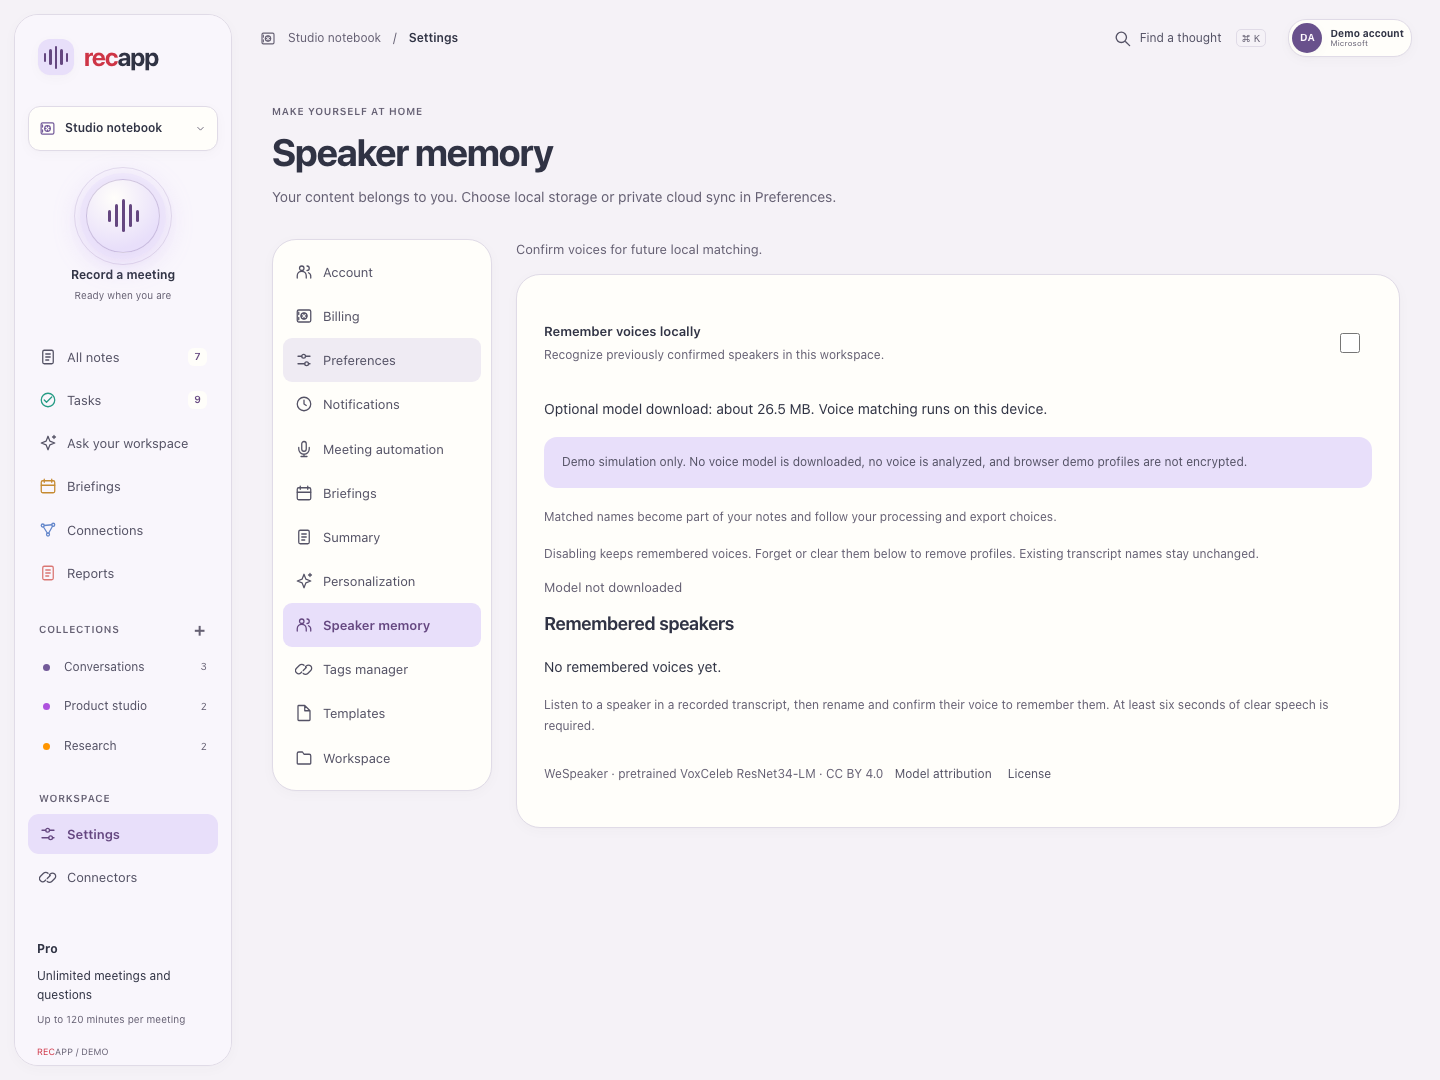
- Enable Remember voices locally and review the optional voice-model download of about 26.5 MB.
- Listen to a recorded speaker, rename them and explicitly confirm the voice. At least six seconds of clear speech is needed.
- Review remembered speakers. Forget a person or clear profiles when you want to remove them.
Matching runs on the device and can be wrong. Turning the setting off keeps profiles; Forget or Clear removes them. Existing transcript names remain. Confirmed names become note content and follow your processing/export choices.
Back to top ↑23
Settings → Tags manager
Manage reusable tags and the related notes in the selected workspace.
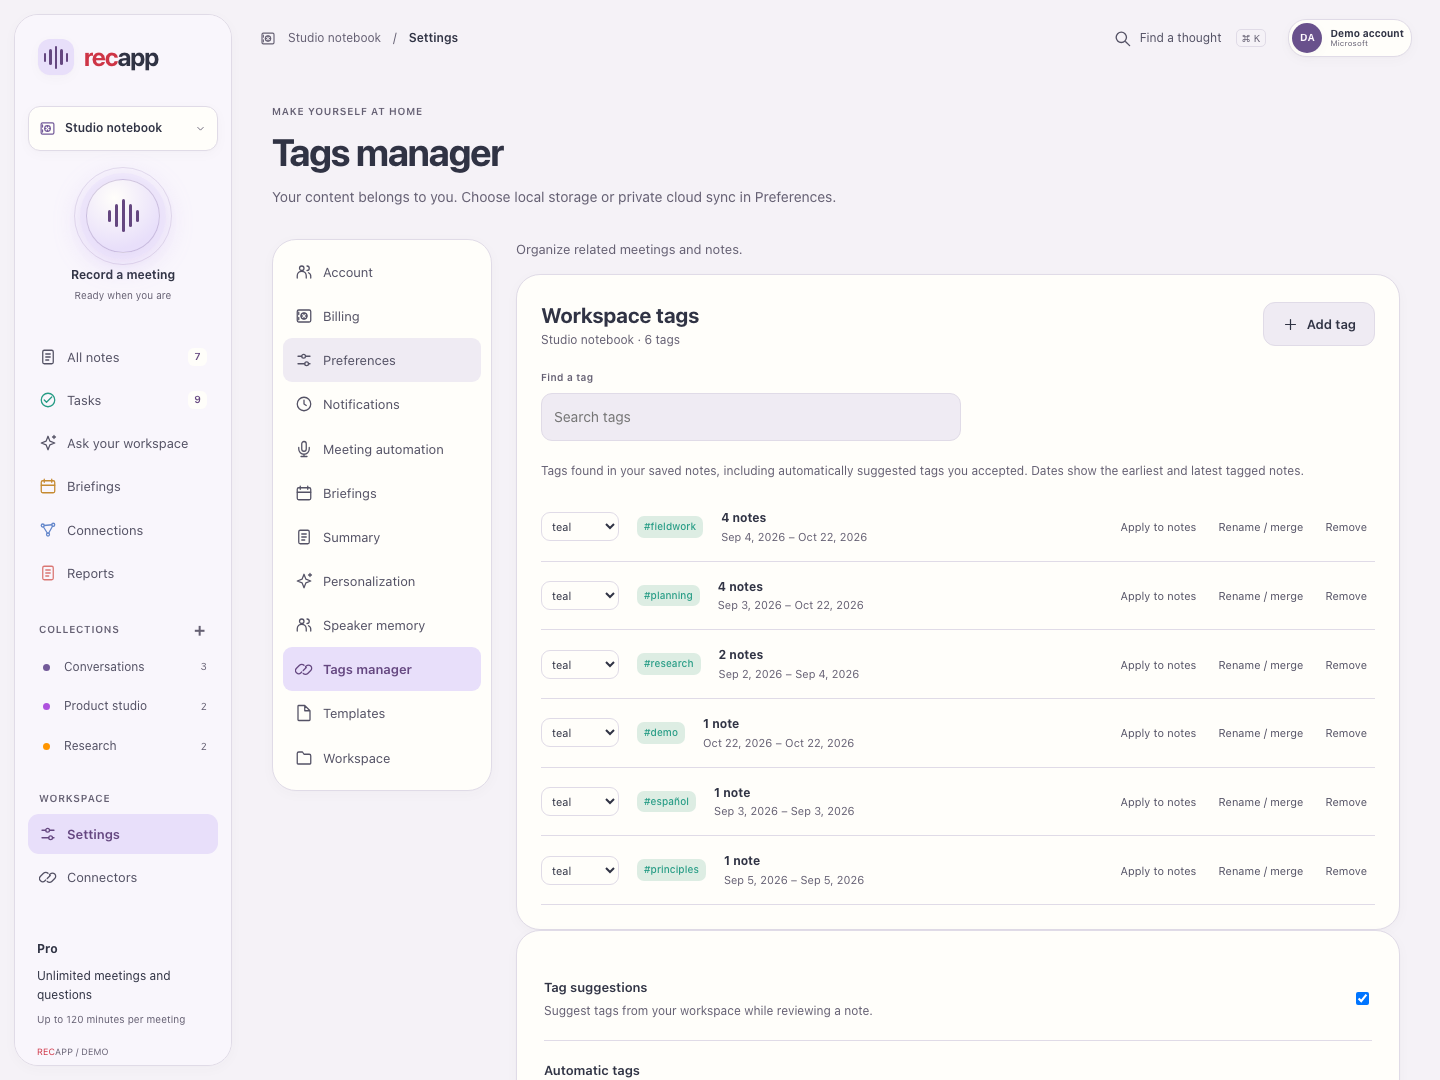
- Search tags, add a tag and optionally select notes to apply it to. Choose a color for recognition.
- Apply tags to notes, rename or merge a tag, or remove it after reviewing the affected notes.
- Tag suggestions proposes existing workspace terms while you review a note. Automatic tags adds suggestions when a meeting summary finishes.
Removing a tag keeps the notes. Renaming to an existing tag merges the groups. Saved chats inherit source-note tags; shared tags can appear in Connections.
Back to top ↑24
Settings → Templates
Templates describe the meeting purpose and the sections a new summary should contain.
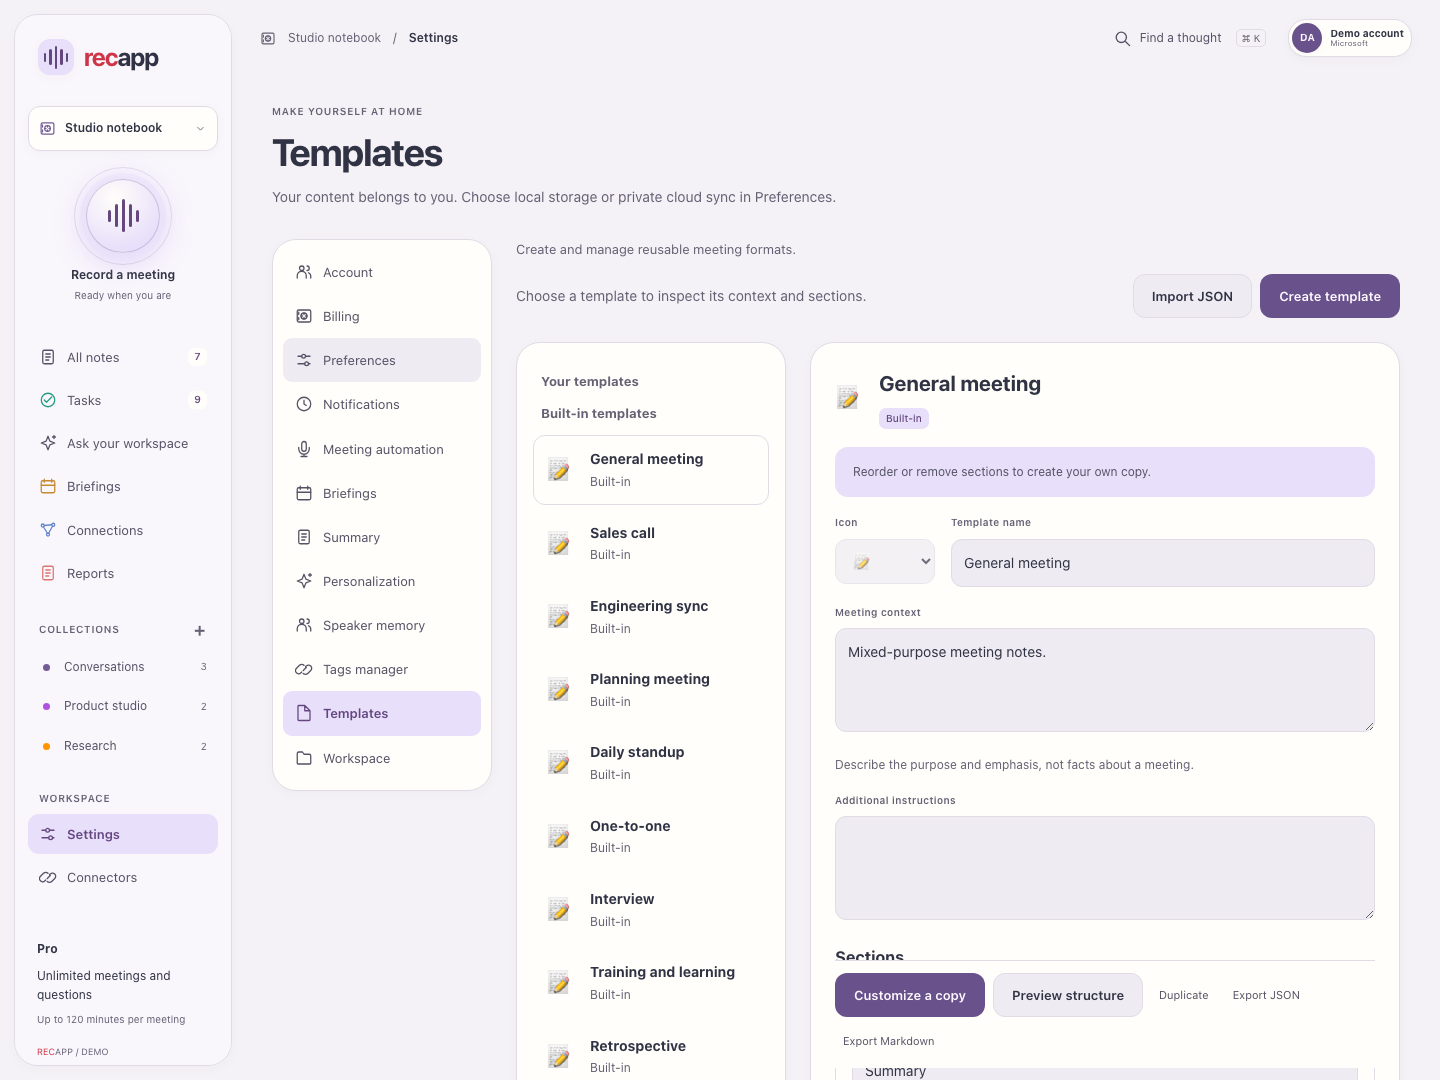
- Select a built-in template. Use Customize a copy or Duplicate to edit your own version.
- Create a template with a name, icon, meeting context, additional instructions and ordered sections. Each section has a title and instructions.
- Review the size indicator and save status. Changes autosave locally; preview the structure and choose a default where offered.
- Import JSON to reuse a template, or export JSON/Markdown for a portable copy. Delete a custom template only after checking which default uses it.
Built-in templates stay unchanged. The editor shows the 2,000-character size budget. Describe purpose and structure, not invented meeting facts. Previous summaries stay unchanged.
Back to top ↑25
Settings → Preferences: storage and diagnostics
Choose local storage or private Azure cloud synchronization.
- Use cloud storage to upload all workspace content and portable preferences. Pro and your first 30 days include up to 20 GB. Confirm the upload to begin.
- Sign into the same account on another device and enable cloud storage there. Sync runs while Recapp is open, once recording and processing finish. Conflicting edits require you to choose which version to keep.
- Choose Download and delete cloud content to retrieve current files and permanently remove the cloud workspace. Downloads and deletion remain available after your trial or subscription expires. Other devices keep their local copies and stop syncing.
- Diagnostics is also in Preferences. Send error reports controls sanitized diagnostics; meeting content is not attached. Version and update checking are at the bottom.
Connections and Azure storage are encrypted. This is not device-only end-to-end encryption. The service can decrypt content for synchronization and requested AI processing. Local recovery copies remain on your devices.
Back to top ↑26
Settings → Workspace
Manage workspace folders in one place.
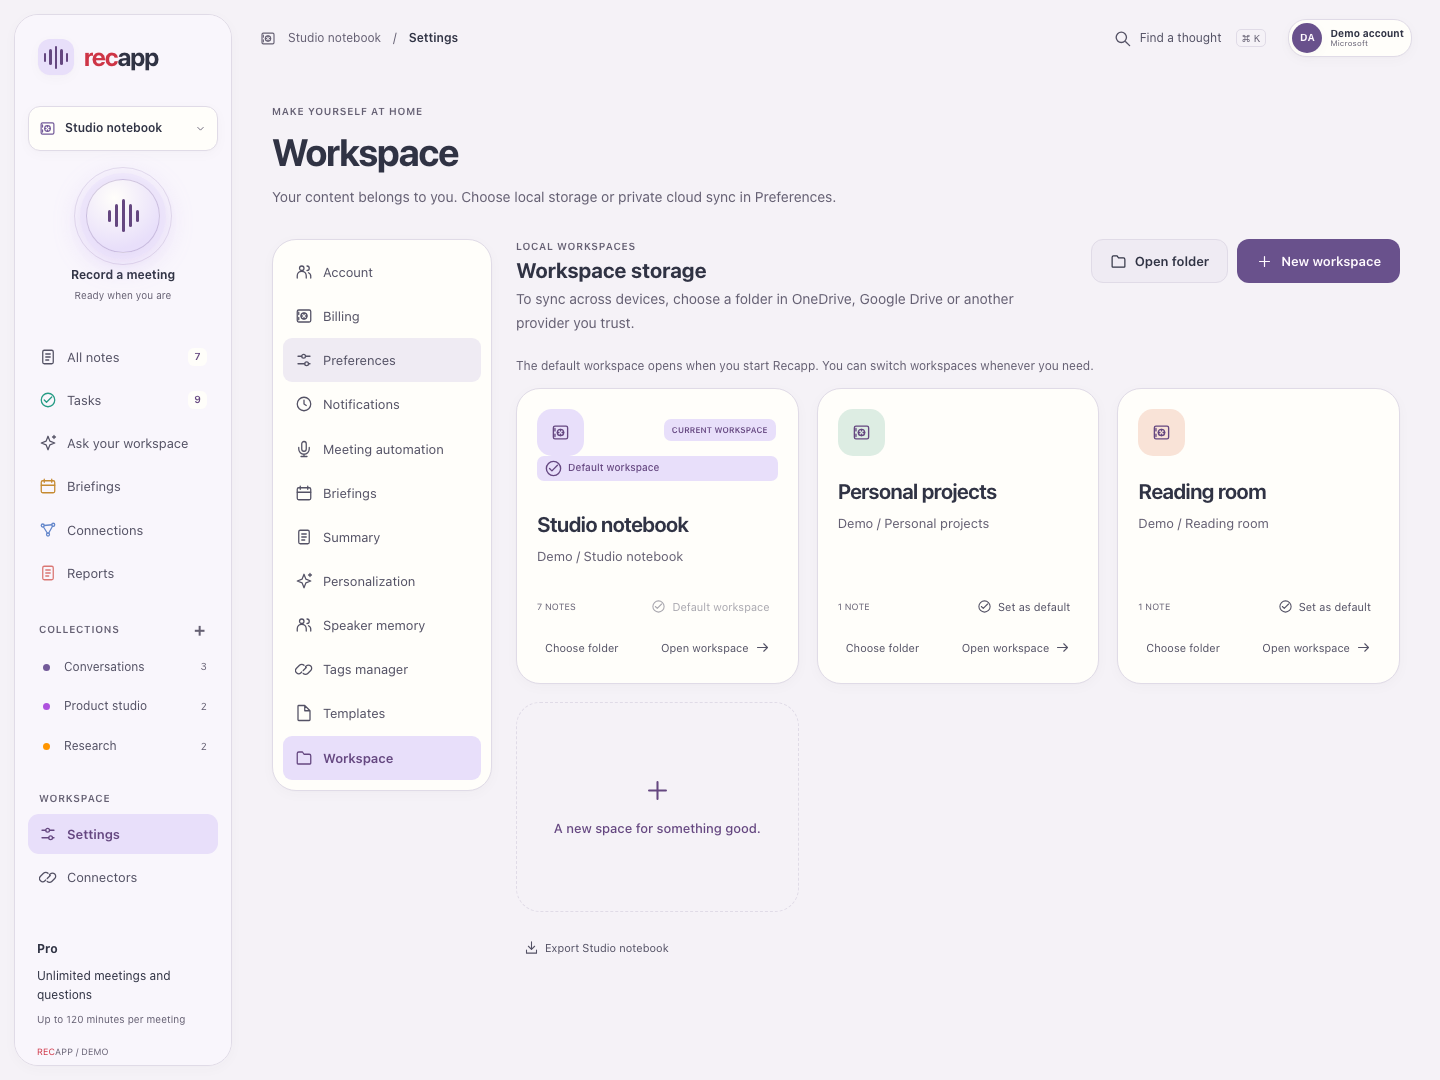
- Create or open a workspace. Use the available workspace actions to rename it, choose the default or remove it from Recapp’s list. Pro is needed for additional workspaces.
- Choose folder moves notes, transcripts and attachments together. For syncing, choose a folder in OneDrive, Google Drive or another trusted provider.
- Use Export current workspace for a portable copy.
- Settings → Preferences contains export attribution, version and update controls. Pro can turn export attribution off.
Back up before relocating a workspace. Removing access from the app does not erase the folder.
Back to top ↑27
Connectors
Open Connectors from the main navigation and choose the destinations you need.
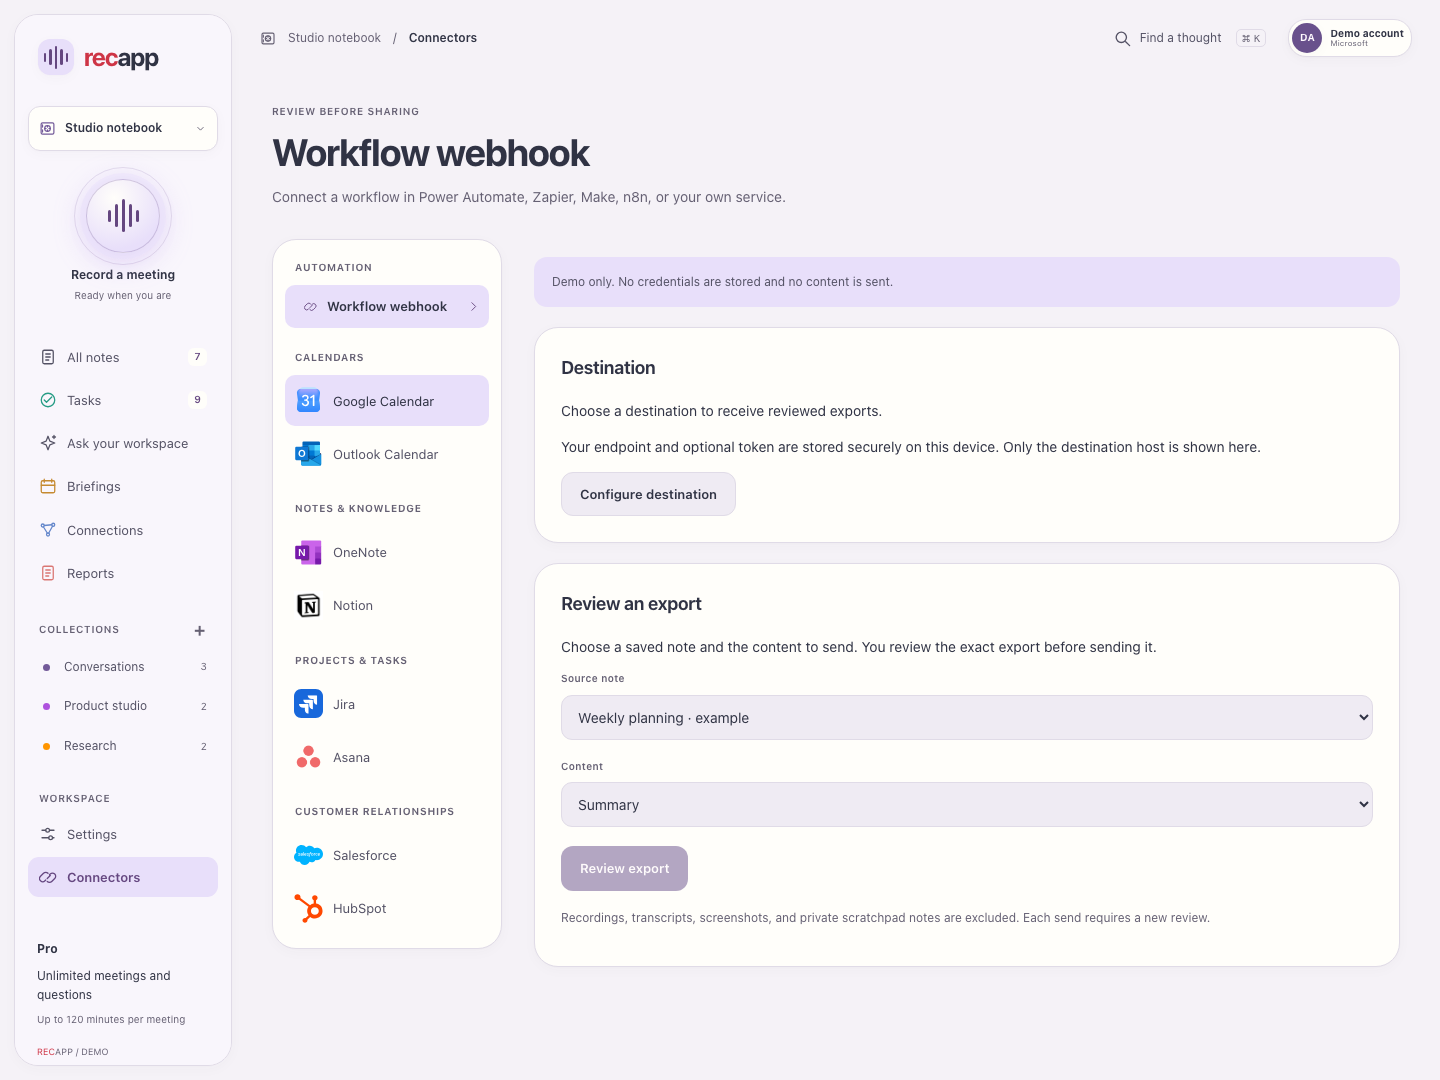
- Explore connectors to manage Google and Outlook calendars or a Workflow webhook. Supported connectors require Pro.
- Review permissions, selected calendars or destination host before using a connection.
- Disconnect credentials when no longer needed. A card marked Coming soon cannot connect or send content.
Calendar sign-in is separate from Recapp sign-in. Workflow exports always require your review; connecting a destination does not send every note automatically.
Back to top ↑28
Updates, troubleshooting and support
Keep the app current, preserve your source files and send a clear private report when you need help.
- Find the version/build in Settings → Preferences. Check for updates and read What’s new; replay the app tour when available.
- For missing audio, check microphone permission and the platform’s system-audio support. Make a short test and listen to both sides before a real meeting.
- For processing problems, check sign-in, internet and plan allowance. Keep the saved recording and retry; use recording recovery after an interruption.
- Read the FAQ below, then open Support to send a private report. Include platform, app version, what happened, what you expected and steps to reproduce.
Reports are queued for a private GitHub issue and notification to support@recapp.ca. No GitHub account is needed. Support has no SLA or guaranteed response/resolution time. Do not submit passwords, tokens, private recordings or meeting content.
Back to top ↑Frequently asked questions
Do I need an account?
Yes. Sign in with an available Google, Apple or Microsoft provider. Signing in does not upload or synchronize your files. Cloud processing runs when you request transcription or AI features.
Can I record without internet?
Capture saves audio locally after setup and admission. Transcription, summaries and AI chat require internet and a signed-in account. Do not assume a new meeting can start without service access; check the app’s readiness before you begin.
Where are my files?
In your local workspace folder. Find it in Settings → Workspace. Sign-in and Pro activation do not synchronize notes between devices. To sync notes, choose a workspace folder in OneDrive or Google Drive and open it on each device. Your provider handles syncing; Recapp does not host your notes or recordings. Keep an independent backup.
How do I use the light appearance?
Open Settings → Preferences → Theme and select Light. Interface language and summary language can be selected independently.
Why is only my voice in the recording?
Check the platform: Windows and supported Mac capture system audio plus microphone; phones use microphone audio. Check permissions, output device and a short two-person test. Headphone calls on mobile generally cannot be captured directly.
Why will processing not start?
Check internet, sign-in, plan allowance and service availability. Keep your audio. Follow the saved note’s error and retry controls.
Why do speaker names look wrong?
Speaker labels and optional local matching are estimates. Listen to a sample and rename the speaker. Calendar invitees are not proof of attendance or speaking identity.
Can I generate only tasks or only a summary?
Yes. Automatic generation has separate switches in Settings → Summary. You can also generate each later from the note.
Does deleting a note delete its recording?
No. Source audio and transcripts remain for recovery. To remove a meeting completely, review attachments, transcripts, recovery files, exports and backups. Check shared references before deleting files.
Does Pro move my files to another device?
No. Activation transfers Pro access for the account. You must move or back up your local workspace separately.
Will Recapp send my follow-up email?
No. A chat draft or calendar recording notice is something you review and send yourself. Workflow exports also require explicit review and send.
Which connectors work now?
Supported Google/Outlook calendars and reviewed workflow webhooks are available to Pro when configured. Cards marked Coming soon are previews.
How do I cancel or restore a subscription?
Manage Stripe purchases through the available subscription portal. Manage App Store purchases in Apple’s subscription settings and use Restore purchases on iPhone. Deleting a Recapp account does not cancel billing.
How do I report a bug privately?
Use the Support form or email support@recapp.ca. The form queues a private GitHub issue and support notification, without requiring a GitHub account. Support has no SLA or guaranteed response time.